How To Take Care Of A Diecast Model | Complete guide (Clean, Store, Restore)
Collecting diecast model cars is one thing but maintenance is another. For a collector, one of the skills that you need to develop is to take care of your models. It proves your expertise in the field plus, you can be sure that the value of your diecast models will increase over time. But how do we really take care of a diecast model car?
Taking care of your diecast model has three main parts: cleaning, storing, and restoring. Cleaning is where you remove dust and shine to maintain its looks, storing is where you put your models to prevent oxidation, and restoring to prevent bigger damage to the model.
This guide will talk about all three of them and everything a beginner should know when taking care of a diecast model. let’s begin.
How Do You Take Care Of A Diecast Car?
Here are the things you need to know when taking care of a diecast car:
- Clean your models to restore its shine and prevent any dirt
- Storing your models in a place where you can prevent any discolorations and oxidation
- Restoring your models to remove small imperfections while they’re still small
As a general rule, Diecast copies can be cleansed with a gentle cloth and warm soapy water. However, when there is too much dirt to be cleaned, you may opt for a strong chemical or alcohol-based solution.
But, strong chemicals or alcohol-based cleaning agents should be avoided while caring for die-cast collectibles since they can erode paint and lead colors to fade.
That’s why you should refrain from using this kind of chemicals if possible.
For a detailed guide on what solutions to use when cleaning your models, feel free to check this guide I’ve written: Model Sanitation guide
Tips to take care of your diecast car
Cleaning
The most basic thing to do in taking care of your diecast car is to clean the model.
Cleaning can be done in 3 easy steps.
- Removing Dust
- Deep Cleaning
- Waxing and Polishing
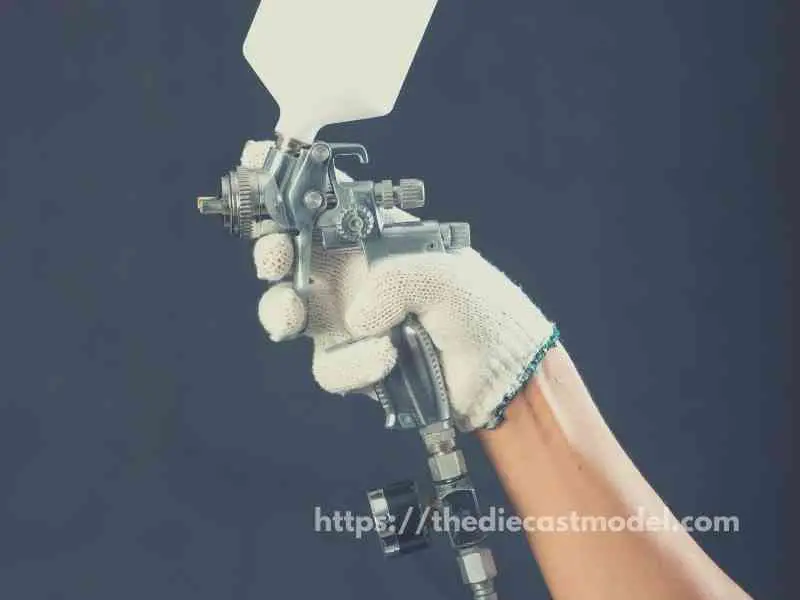
Removing dust can be done as easily as using an airbrush or a simple brush.
This step is very important because airbrushing will also remove dirt and grimes that can scratch the model surface.
The reason is that heavier or denser dirt can actually scratch the model surface especially if wiped immediately. That’s why it is essential to remove them first with an airbrush or if you’re on a tight budget, a brush with soft bristles.
I recommend the Tamiya brush since it’s specifically made for models. Plus, they aren’t harsh to the paint.
| Comments | Recommended Product | |
| Air Brush | Best in Cleaning | Check on Amazon |
| Air Duster | Good Alternative to Air Brush | Check on Amazon |
| Brush | Cheap | Check on Amazon |
For a detailed guide on the brush I’ve recommended, feel free to visit this article: How to remove dust from models | A detailed guide
Furthermore, make sure to polish and wax.
But let me start by differentiation polish and wax.
Put a coat of wax on them on these metal parts of the course and you let it haze up just like you know the normal code wax and like you do a normal car wax
Wax is important because it protects your models from any harm. While the polish is used to shine your model.
Currently, there is a wax that counts as both polish and wax.
If you’re a beginner, go for a liquid wax.
The reason is that in case you messed up and got some wax accumulation on the hard-to-reach surfaces, it can be easily removed.
Solid wax is actually harder to remove than liquid wax.
If I’ll be talking a lot about taking care of your collection, this part alone might be too long.
If you want more guidance on what wax to use and just a general guide to make your model shine like brand new, then I recommend you read the guide I’ve made here: How to Make A Diecast Shine
To Store or Display
Some model diecast collectors buy them to exhibit them, while others buy them to store them.
Are you among those who say, “Forget storage”? Show them off so you can realize how beautiful they are.
Isn’t that why we began collecting them?
It makes no difference to which group you belong to; this post will benefit you.
Store models for Boxes or Mint Condition
This is the cheapest and for me, the best form of storage.
In fact, you get the box if every time you buy a new model.
Not only does it maintain your model, but it also keeps the price of your model car.
What I mean by that is model cars that are out of their box would usually have a lower price.
How lower? About 20-25%.
I actually made an article discussing that in more detail.
Here is the article and I recommend you to read it especially if you plan on selling your model in the future: Value of diecast models: with vs without the package
Also, I recommend putting them into their box and into a glass shelf.
The reason is that that they will rarely get dust on them even after a year of such setup.
But make sure there will be access to air because the models might go a year without getting any fresh air and that has its consequences.
If you bought them brand new, keep them in their original boxes.
To store them, stack them by brand or carmaker, for example, all Chevrolet cars are stacked together, all GM cars are stacked together, and do same to Lamborghini, Ford, Chrysler Dodge, Ferrari, and so on, so they’re all together but still in their original boxes.
The best way to describe this; is like keeping a fish in an aquarium, a natural habitat is similar to using its original box.
It’s a nice idea to keep them stored that way, but in a spare bedroom so that dust doesn’t accumulate, and to keep them cold in the winter using the air conditioner and warm in the winter using the thermostat.
Here are my recommended storage spaces. You need these especially if your model is out of the box.
Recommended Storage Cabinets
I have 2 options for you. The reason why 2 is because it depends on your preference. One is for showing off while maintaining them, and another is purely for maintaining.

This one prevents light to prevent damage to the paint. Many people don’t know but sunlight or plain light can actually harm a model car’s paint in the long run. Plus, it is made of wood to prevent any temperature fluctuations.

This is considered to be more balanced since you can show off your models to visitors. But do not put all the models tightly packed together. The reason is these models are still made of metals which is a conductor of heat. My recommendation is only 1 model per slot.
It’s already good that you know what to do. However, it doesn’t end there.
it’s also important to know what are the things you shouldn’t do when storing your diecast models.

Don’ts – How Not To Store Your Diecast Models
Here are the things that you shouldn’t do in order to take care of your models.
Don’t wrap models with newspaper
Please avoid using a newspaper at all costs because it will almost certainly transfer the print to the paint or result in all kinds of unthinkable damage.
Don’t use acid-free paper or paper towels
Don’t use acid-free paper or paper towels too, not even for a second.
Why would you store your expensive model in cheap acid-free paper or paper towels?
It’s not safe for your model, it’s probably just as awful as a newspaper.
Don’t store your models away for too long without checking
Chances are your models will be alright after a year, but there will be humidity, cold, heat, and chemicals leaching out of the boxes, so don’t store away and go away for more than 12 months, as you don’t know what can happen.
I recommend cleaning and waxing your models at least once a year.
Don’t keep them in bad weather conditions
Avoid keeping your models in the store or basement except if the AC will be on.
When the weather is hot or in a humid environment and the source of heat is very cold, make sure to keep it elsewhere or use an AC to keep your diecast home and dry.
Don’t Store in 100% Air Tight Condition
Balance is the key to everything.
While it might sound good to just 100% airtight your model it’s a bad idea.
There is a concept of anaerobic microbes where they grow in environments without air. It can destroy your model in the future.
There’s a need for balance when it comes to the air, the sweet spot is an air hole someplace to prevent this from happening.
How to display your model
Your model car can be displayed in one of two ways: open or closed.
The ideal manner to present models is determined by your choices, resources available, and budget. Let’s look at some of the alternatives below:
Putting Your Model Cars on Open Display
The simplest and cheapest approach to display your model car collections is to put them out in the open.
Cleaning a fragile model may be something you want to undertake on a regular basis if you choose to put your models on an open display.
You will have to dust and clean them more frequently; also, if you have children (kids and young adults) showing your models freely in the open is probably not the ideal decision for you.
Using Shelves to Display Your Model Cars
You’ll almost likely need a display shelf if you’d like to display your miniatures in a case or out in the open.
Whenever it comes to your shelves, there’s no need to go all out.
If you have an old bookcase or other wall shelves lying around, you may use them.
If any of these options appeal to you but you’d like them to be larger, a short search in your local stores or online stores like eBay or Amazon may offer some results.
Making Use of Display Cases
You can obtain a display case for a new model and afterward add it to the automobile if you wish to add it to your collection.
The model will be protected from dust and inquisitive hands while remaining plainly visible in display cases. If you can’t find a large enough case, a fish tank can be used as an alternative.
Making Use of a Display Cabinet
Model vehicles are best displayed in exhibition cabinets.
They combine the advantages of shelves and display cases into a single unit, and some even feature lockable doors.
All you have to do now is decide which cabinet to acquire and where to put it, and the rest will be taken care of.
If nothing matches what you’re looking for, simply look about in your local stores and online until you find something that does.
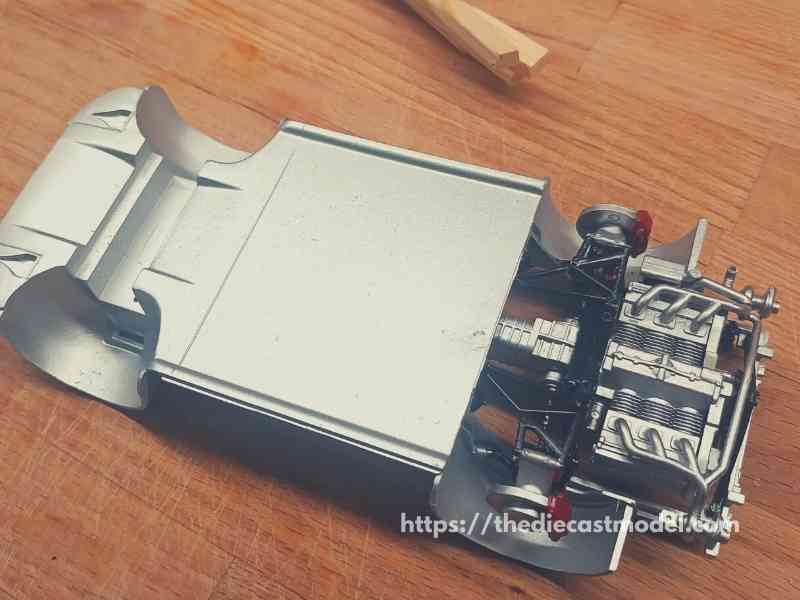
Paint Peeling Off
We are talking about preventing any damage to your model.
One of the things to look out for is if the paint peels off.
It can mean two things.
- One is that the paint is already old.
- Two is that the insides are having some sort of rust. Also known as zinc pest on diecast models.
Whatever the reason is, the outcome is always the same.
If you don’t treat it right now, it would get bigger in the future.
So here is what you will do just in case.
If the paint on your diecast car is chipping away, all you have to do is scrape it down to the bare metal, prime it, and repaint it.
Here’s how to repaint your diecast car step by step.
Remove all of the pieces from the car until you’re left with just the metal shell.
Step 1: Put everything in a small sealed bag
The first step is to place all trim, interior, and other items in a sealed sandwich bag for safekeeping during the procedure.
This is important since if we lose even a single small part while doing this can break a model.
Step 2: Strip the paint
You could spray over the old paint or strip it, but you’ll have uneven gaps and thicknesses.
Soak it in brake fluid, it will erase the paint over the course of a day or two.
You can use an old toothbrush or any other brush, but make sure it doesn’t scratch the metal.
It’s not as difficult as it appears to remove the paint from your car as well as the body.
Step 3: Wash and dry to body
Once all of the paint has been removed, wash and dry the body to eliminate any remaining fluid.
Before painting and between coats of paint, avoid touching your body because the oils on your skin can harm the paint. (Hold the body with a bent coat hanger so you don’t have to touch it.)
Step 4: Start repainting
You can repaint the car with any type of spray paint, but you need to use a primer first.
The majority of them are light gray. Any type of spray paint will do, just make sure your priming and final color match.
If you need a guide on what paint to use, I have a more detailed guide here: How to Paint a Scale Model
When you paint keep the can about 12 inches or 30 cm away.
Start by spraying ahead of the body. Then move in a gentle sweeping motion sideways.
Focus on the intricacies of the body rather than the paint, as this may cause runs and thicken the paint, obscuring the intricacies.
That’s why you should keep the spray paint 30 cm away from your face.
Directing a can at the body and spraying it will result in smeared paint and a poor finish. That’s whether you should start in place of the body and sweep past it in a sideways motion).
You might not be able to cover your full body on the first attempt.
Step 5: Apply Clear Coat
Between coatings, wait at least 12 hours.
Let it dry completely or the finish will not be perfect.
Clearcoat is important to protect your paint in the future.
You can always purchase additional brake fluid and start over if you mess things up.
Use q-tips to get into a letter and find hard-to-reach locations, small spots, and other difficult-to-reach areas.
When the painting is properly done, your model will have a metallic sheen, but it’s not metallic; it’s just a gloss effect.
Conclusion
The sky is the limit when it comes to displaying your model automobiles.
You might hang them from the ceiling, like model airplanes, or connect them to the wall directly.
Don’t be afraid to be creative (as long as you don’t jeopardize your models).

“Only the things I love”
thediecastmodel.com is reader-supported. When you buy through links on the site, I earn an affiliate commission.
So, here are the things I love when taking care of my Diecast Models.
Cleaning the Models
The first we are going to talk about is cleaning the models.
Removing Dust
- Air Brush – For me, this is the best since it not just removes dust but you can use it in painting/clear coating.
- Air Duster – This is a good alternative to Airbrush
- Normal Brush – If you are short on budget, you can use a normal brush. However, make sure that the brush has soft bristles because there are some hard brushes than can cause scratches. That’s why I recommended a good brush that can do the job properly.
Cleaning and Shining Hacks
Well, here are some of my cleaning hacks for removing scratches, oxidation, and so much more.
- Removing Decal Adhesive – Use Goo Gone on those hard-to-remove decal adhesives. It works fast and works like charm!
- Waxing and Polishing – Here is something a lot of people don’t know. Waxing protects the clear coat and paint while polishing shines the model. Instead of buying it separately, use a 2 in 1 to save money. Get this instead.
- Beginner Wax – The wax I recommended earlier is good and provides the best results based on my experience. But a beginner might have a problem especially if they’re not good at applying wax. Solid wax reaching hard to reach surface can be hard to remove. You have two choices here. One is to use a qtips to reach those surfaces, another is to use a liquid wax I recommended.
- Cleaning Wheels, Rubber, Plastic – Do not forget that rubber and plastic surface are quite different, especially in the cleaning process. Just wiping it down won’t do the job. That’s why I use Meguiar’s Vinyl and Rubber Cleaner and Conditioner. Works like charm!
- Make the Wheels Shine! – Making our models look good won’t be complete without tiny details such as shiny wheels! Do not forget this because however small this is, the difference can be as big as night and day.
- Remove Scratches Easily – Tiny scratches are not the end for your model. Here is a simple trick I’ve been using to make my models look scratch-free even without repainting. Use T-Cut.
Painting the Models
Painting Tools
Make sure when you paint models, have these ready.
- Tape – A tape is important if you are painting a straight line. Furthermore, it will prevent your paint to scatter on other parts. I recommend Tamiya Tape since it is really made for models. Furthermore, they stick really well preventing paint splatters.
- Brush (Beginner) – Find a good set of brushes to paint your models. Of course, you can opt for an airbrush but it’s quite expensive.
- Airbrush (Intermediate/Expert) – This will yield a significantly better result than an ordinary brush because you can easily spray the paint evenly. I recommend this if you know what you’re doing.
- Stand(Optional) – Stands are good because it can be hard to manually hold the models while painting. It is optional but in my opinion, the price is well worth it for the comfort it gives.
- Drop Cloths – Drop Cloths will protect your surroundings from the paint.
- Primer – The most common beginner mistake I see is painting models without any Primer. A primer will prevent imperfections such as bubbles or paint not sticking to your models. It is a small price to pay for quality results.
- Clear Coat – A clear coat will protect the paint of your models. This will make the paint last longer. Also, it is the one responsible for making your models shine.
Paints
Of course, you can’t do painting properly without paint. So here are the ones I recommend.
- Acrylic Paint – Good for beginners because it dries quickly. However, it doesn’t produce results as good as enamel paint.
- Enamel Paint – Provides a good quality finish and longer-lasting paint. However, it takes longer to dry and requires expertise to use.
Model Maintenance
Model Storage
- Simple Wood Cabinet – While it doesn’t let you display your models, wooden cabinets are good storage for these models. For one, they are not heat conductors which means that the temperature inside will remain constant and remain cool. Furthermore, they prevent light from reaching the models which can cause oxidation.
- Clear Cabinet with Lock – If you want to display your models, then I recommend this. It closes so dust won’t easily get to your models. I also recommend you don’t put more than 1 model in each compartment since metals are good conductors of heat.
Model Photography
So you want to show off your models to others? Well, I got you covered.
Here is my beginner-friendly model photography tutorial that teaches everything from taking pictures to the editing process.
You will also see me doing hands-on photography in that tutorial.
Here is the link: How to Take Pictures of a Diecast Model or Model Kit | Helpful Illustrated and Video Guide
Sources
- Wikihow