Tamiya Models: Are They Hard To Build?
When starting model kit building, one of the first brands that might come to your mind is Tamiya. Tamiya is a big model kit manufacturer which most collectors prefer to buy and build. However, it is also essential to know if Tamiya models are hard to make. Are Tamiya models hard to build?
Tamiya models are hard to build if you’ve chosen a level 5 kit. Tamiya models have an indicated difficulty level, with each model kit having level 1 as the easiest to level 5 as the hardest. Beginners should start at level 1 since it requires fewer materials and fewer pieces to join together.
In this blog post, we will talk about the various skill levels of Tamiya. We will also compare each of them so you can have an idea of what fits your current level. Furthermore, I am going to give some tips to make model-building easier.
Are Tamiya Models Hard To Build?
In general, Tamiya models are easy to build since they are one of the best model kit manufacturers when it comes to giving detailed manuals on how to complete their kits. However, some Tamiya models are hard to build, particularly their level 4 or level 5 models.
Tamiya’s fundamental objective is to offer the world the most rewarding modeling experience possible.
Grasping the various parts, assembling, and finally painting a finely crafted model is genuinely a unique and uncommon experience in today’s advanced world.
Tamiya feels that this hands-on experience is invaluable.
So, whether it’s our careful attention to quality or our commitment to ease-of-assembly, we are constantly striving to create truly satisfying ways to spend one’s time.
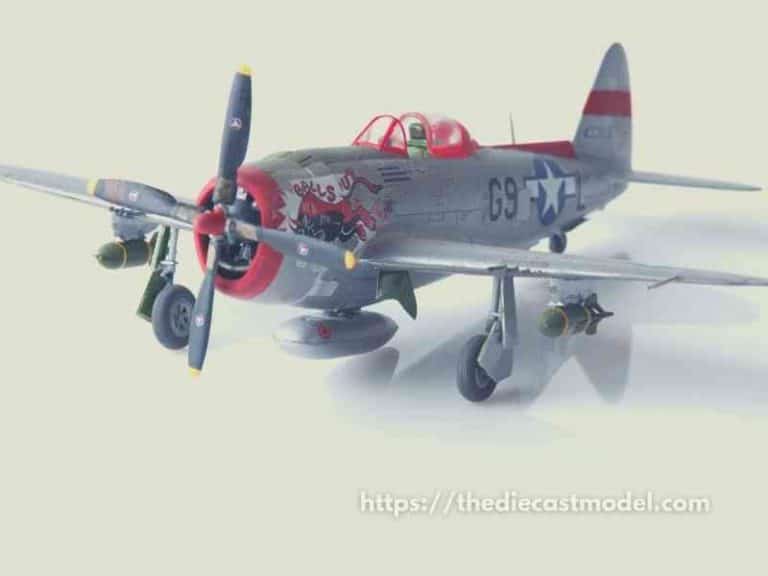
Some famous Tamiya models include:
- McLaren M23 – 20002.
- Porsche 928 – 20003.
- Team Lotus J.P.S. …
- Martini Porsche 935 Turbo – 20005.
- Wolf WR-1 Ford – 20006.
In any way, Tamiya’s assembling is not so complex for an individual, yet you should choose the expertise level you can easily complete.
Furthermore, it is vital to take note that you should always follow the instructions given by Tamiya for their models since that’s their approved way of building their specific model.
In fact, Tamiya has been known as the best model company in terms of giving detailed instruction manuals.
Well, the difficulty of the model you’ll build depends upon the skill level you have chosen.
This decides whether it’ll be simpler for you or not in the future. So, you would have to ensure that your selection is up to your skills or not.
Model expertise levels are from 1 to 5, with 5 being the hardest and 1 the easiest.
For example, level 1 might have 10 to 30 pieces, level 3 from 80 to 100, and five from 200 up to 1000 or more.
Level 1 is a snap-together kit requiring no paint, whereas all other levels need glue and painting.
Here’s a look at the skill levels:
- Ability Level 1: Easily snap-together pieces and do not need glue or paint.
- Ability Level 2: Simpler kits that require glue and paint to complete. They usually have under 100 pieces.
- Ability Level 3: Smaller, more detailed parts. They typically have over 100 pieces.
- Advanced Level 4: Advanced kits with extra-fine subtleties. They most certainly contain over 100 pieces.
- Ability Level 5: For master modelers. They have super-itemized parts, can contain hundreds of pieces, and often have moving parts, like working suspension on cars and motorcycles, rotating propellers on planes, and movable turrets on tanks.
| Ability Level | Number of Pieces | Ease of Assembling |
| Ability Level 1 | About 10-30 pcs | Easy Snapping, Requires no Gluing |
| Ability Level 2 | Less than 100 pcs | Easy Snapping, Requires Gluing |
| Ability Level 3 | More than 100 pcs | More Detailed Parts |
| Ability Level 4 | About 100 to 200 pcs | Extra fine and delicate parts |
| Ability Level 5 | About 200 to 1000 pcs | For Master Modelers, have delicate and moving parts |
What Do I Need To Build A Tamiya Model Car?
Many individuals believe that building a plastic model is troublesome.
Nonetheless, Tamiya kits are designed and easy to assemble, even for beginners.
Assembly manufacturing, painting, applying markings, and weathering, the fun of modeling is not limited.
Let’s have a look at the art of modeling!
1. Make Assembly
An assembly is one of the most crucial parts of modeling.
As you put each part together, you gradually see the excellent finished result appear in front of your eyes.
You need to cut the parts off the sprues, which would be in the order outlined as given in the instructions, and glue them together. It’s that simple!
Adhering to the guidelines, use side cutters and a modeling knife to cut the parts off the sprues (sometimes called trees).
A nail clipper can be a convenient trade for side cutters.
Keep in mind that only cut off the necessary parts for the Assembly of that specific section.
Many kits contain parts similar to each other, so read the instruction manual carefully, checking the part numbers twice.
Check The Part To Be Used
Cut the parts off the sprue carefully in the order outlined as explained manually in the instruction.
Don’t cut off all the parts at once; you won’t know which part belongs to which number.
- Cut off part from the sprue.
- Cut off part using side cutters. Note the correct way to use side cutters.
- Cut off Excess
- Cut off any attached sprue with a modelling knife. The remaining sprue may interfere when joining parts together, resulting in a poor fit.
Gluing Parts
Glue parts together using Tamiya Cement.
Apply a modest quantity of cement to any of the gluing surfaces.
After it, press the parts together for better attachments. Leave for a while until the cement has solidified.
Follow the underneath steps in sequence.
- Remove any excess cement – Dip the brush into the cement and remove any excess cement before applying.
- Apply cement to glueing surface – Apply cement to glueing surface. When you place parts together, it may squeeze out, so do not apply too much
- Press parts together – when applying cement, press all of the parts together. Hold them tightly together so that they mold firmly
Note: Make sure that the cement you are using does not melt plastics. If you use or buy the wrong glue, it can melt your model instead of joining it. Feel free to use my comparison on Tamiya cement to know how to glue correctly. Here is the link: Tamiya cement comparison
Easy Tips
When gluing metal-plated parts, cement does not work on metal-plated surfaces.
But that doesn’t mean you can’t glue metal surfaces. What you have to do is to scratch off the plating of the gluing surface utilizing a knife.
This will make a surface for the glue to stick on. However, be careful as scratching your models means you can break them.
Tweezers can be genuinely convenient – It is difficult to get an excellent grip on small parts using fingers. This may result in getting cement on your hands and dirtying all parts.
By using tweezers, you can get rid of this problem.
2. Painting Your Model
Painting your model gives it a more excellent finish and a realistic feel.
Here, you will get tips about brush painting and spray-painting tips.
Spray Painting
Spray painting is recommended for large parts such as vehicle bodies.
It is significantly speedier and will give you a vastly improved finish.
Avoid spray painting on windy or cloudy days. Humidity in the air will take off the shine.
Steps that you should follow are as follows:
- Shake spray can
- Spray on a light undercoat
- Add each coat gradually
- Dry completely
Note: I recommend brush painting for beginners
Brush Printing
Brush painting is not difficult to paint small parts while they are still associated with the sprue.
Since it is good to brush on small parts, it makes a better finish, especially for beginners.
After the paint has dried, cut off parts and paint over the remaining cutting region.
By using a brush for painting small parts, you will get:
- Safe and thorough parts painting
- Beautiful gleam finish of the parts
Here, the use of metallic color paint markers adds value to it.
Apply Decals
Adding decals for the final touch highly adds value to the magnificence of your manufactured model.
You should have to follow these simple steps in this regard!
- Cut out the decal from the sheet
- Dip in tepid water
- Apply to the model
- Remove air bubbles and excess water
That’s how you can finish your Tamiya model manufacturing.
In addition, Tamiya has perhaps the best-selling acrylic paint on the hobby market, along with accessories, auxiliary products, and weathering supplies.
What’s next? Are you sure about choosing Tamiya as your first build? How about knowing if Tamiya models are good? Here is the link: Are Tamiya Models Good?

“Only the things I love”
thediecastmodel.com is reader-supported. When you buy through links on the site, I earn an affiliate commission.
So, here are the things I love when taking care of my Diecast Models.
Cleaning the Models
The first we are going to talk about is cleaning the models.
Removing Dust
- Air Brush – For me, this is the best since it not just removes dust but you can use it in painting/clear coating.
- Air Duster – This is a good alternative to Airbrush
- Normal Brush – If you are short on budget, you can use a normal brush. However, make sure that the brush has soft bristles because there are some hard brushes than can cause scratches. That’s why I recommended a good brush that can do the job properly.
Cleaning and Shining Hacks
Well, here are some of my cleaning hacks for removing scratches, oxidation, and so much more.
- Removing Decal Adhesive – Use Goo Gone on those hard-to-remove decal adhesives. It works fast and works like charm!
- Waxing and Polishing – Here is something a lot of people don’t know. Waxing protects the clear coat and paint while polishing shines the model. Instead of buying it separately, use a 2 in 1 to save money. Get this instead.
- Beginner Wax – The wax I recommended earlier is good and provides the best results based on my experience. But a beginner might have a problem especially if they’re not good at applying wax. Solid wax reaching hard to reach surface can be hard to remove. You have two choices here. One is to use a qtips to reach those surfaces, another is to use a liquid wax I recommended.
- Cleaning Wheels, Rubber, Plastic – Do not forget that rubber and plastic surface are quite different, especially in the cleaning process. Just wiping it down won’t do the job. That’s why I use Meguiar’s Vinyl and Rubber Cleaner and Conditioner. Works like charm!
- Make the Wheels Shine! – Making our models look good won’t be complete without tiny details such as shiny wheels! Do not forget this because however small this is, the difference can be as big as night and day.
- Remove Scratches Easily – Tiny scratches are not the end for your model. Here is a simple trick I’ve been using to make my models look scratch-free even without repainting. Use T-Cut.
Painting the Models
Painting Tools
Make sure when you paint models, have these ready.
- Tape – A tape is important if you are painting a straight line. Furthermore, it will prevent your paint to scatter on other parts. I recommend Tamiya Tape since it is really made for models. Furthermore, they stick really well preventing paint splatters.
- Brush (Beginner) – Find a good set of brushes to paint your models. Of course, you can opt for an airbrush but it’s quite expensive.
- Airbrush (Intermediate/Expert) – This will yield a significantly better result than an ordinary brush because you can easily spray the paint evenly. I recommend this if you know what you’re doing.
- Stand(Optional) – Stands are good because it can be hard to manually hold the models while painting. It is optional but in my opinion, the price is well worth it for the comfort it gives.
- Drop Cloths – Drop Cloths will protect your surroundings from the paint.
- Primer – The most common beginner mistake I see is painting models without any Primer. A primer will prevent imperfections such as bubbles or paint not sticking to your models. It is a small price to pay for quality results.
- Clear Coat – A clear coat will protect the paint of your models. This will make the paint last longer. Also, it is the one responsible for making your models shine.
Paints
Of course, you can’t do painting properly without paint. So here are the ones I recommend.
- Acrylic Paint – Good for beginners because it dries quickly. However, it doesn’t produce results as good as enamel paint.
- Enamel Paint – Provides a good quality finish and longer-lasting paint. However, it takes longer to dry and requires expertise to use.
Model Maintenance
Model Storage
- Simple Wood Cabinet – While it doesn’t let you display your models, wooden cabinets are good storage for these models. For one, they are not heat conductors which means that the temperature inside will remain constant and remain cool. Furthermore, they prevent light from reaching the models which can cause oxidation.
- Clear Cabinet with Lock – If you want to display your models, then I recommend this. It closes so dust won’t easily get to your models. I also recommend you don’t put more than 1 model in each compartment since metals are good conductors of heat.
Model Photography
So you want to show off your models to others? Well, I got you covered.
Here is my beginner-friendly model photography tutorial that teaches everything from taking pictures to the editing process.
You will also see me doing hands-on photography in that tutorial.
Here is the link: How to Take Pictures of a Diecast Model or Model Kit | Helpful Illustrated and Video Guide