Is Priming Necessary before painting?
When you start customizing and painting models, you would come to a point where you will be introduced to primers. Buying a primer is as important as buying the paint. In this article, we would explain why and talk about priming and if it is really necessary before painting.
Do you need to prime models before painting? Priming is a simple but necessary step in the painting process. You need to prime models before painting because it would serve as the bridge between the surface and the paint. Without any primer, imperfections such as cracks and uneven paint would more likely happen.
We are going to talk about reasons why you should prime a model. Furthermore, I would explain what would happen if you decided not to use any primer. Before that, if you’re into customizing, you might like my other article where I talked about customizing your model. I think it is a good read after this article. Here it is: Can I make my own custom car?
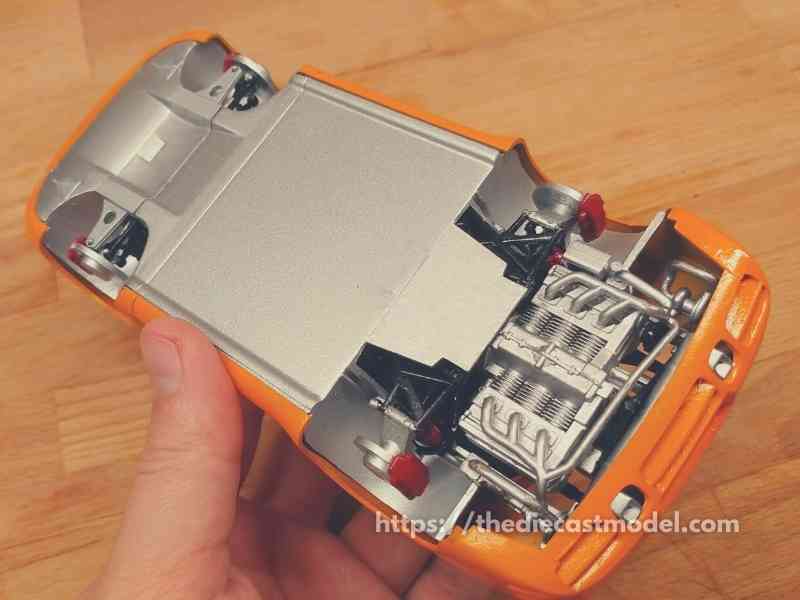
Do you need to prime models before painting?
The “Primer” word is taken from the Latin language word, “Primus”, which means, first, and this is definitely a noun, not a verb.
However, a good amount of people confuses the usage of this word and considers it as a verb.
Let us understand the priming concept.
Priming is considered a significant aspect with regard to model painting. It enhances paint’s adherence capability whereby it establishes the base for the selected color of your miniature models.
It is also a nice option to opt for as it eases the work for you which is needed afterward i.e., the paint job.
Generally, primer performs the same job which an initial paint coat will do on any respective material be it resin, metal, or plastic except that it needs to be done first.
Resin diecasts make highly detailed models compared to traditional ones. If you are interested in resin diecasts, you may check this article that talks about resin diecasts: Are Resin Diecasts Worth it?
Primer’s principal task is to assist the miniature models in inhibiting paint layers absorption which is to be followed in the end process.
The reason is simple.
The model’s surface is actually not really good at absorbing paint layers. But it is good in absorbing primers.
Then, the primer will be the one that will stick to the paint because it does the job better.
Doing this will prevent uneven tones and bubbles in the painting process. Bubbles actually come from paint not sticking to the model’s surface.
Likewise, the primer will set out as the models’ surface for applying paint layers.
Before applying anything to your model, you must first need to prepare the model’s surface.
That preparation is what a primer is all about.
Once your model’s surface is ready to accept prime or paint, you have to decide which option to consider.
In order to accept any paint layer, a primer is used which is also a type of specific paint for preparing models’ surfaces to apply paint directly and seamlessly.
Developing or customizing various miniature models requires a lot of effort, precision, and details that go into the system of creating the requisite shapes and curvatures.
However, these tiny models do have many things to consider in which they are needed to be clean before applying anything onto them.
Dirt and dust can actually hurt the quality of your finished product as it will be obvious once the painting job is finished.
Hence, the surfaces would be tidy for sure to apply any prime, undercoat, or paint.
Some dirt can actually be cleaned by a primer.
A primer helps the models getting grease‐free and any other additional grains that might cause panic later on.
Reasons why you need to prime models before painting
There are three reasons why you need to prime a model before painting. First, it would serve as the bridge or the link between your model and the paint. Second is it does a remarkable job in adhering to each of those leading to a perfect finish. Third, it helps the paint dry quicker.
There are several reasons for which you always need to prime your models before applying any paint layer.
One of the foremost and strongest reasons for priming your models is that it acts as a bridge.
It helps the granular surfaces of the miniature models to be toned down and seamless for the surface to accept the paint layer in a quick manner while enhancing the stickiness of the paint layer.
Usually, priming layers are used by simply holding the spray can at a distance of about 10 inches from your model and sweeping it slowly to form thin but strong layers onto the model’s surface.
This thin layer is highly beneficial for the model’s long‐lasting impression on the buyer.
The second important reason for priming your models is that it will intensify the final finish of the models and the decals will look more prominent by not obscuring the fine details on your miniature models.
Since the priming layer needs to be thin by all means, the paint layer will strengthen the stickiness onto the primed surfaces of your models.
A good-quality primer will definitely deliver a uniform color tone to your entire model.
Therefore, you can safely say that priming your model actually bettered the model appearance which is the most striking factor in terms of customer perception of product quality.
The priming job will fine‐tune the model’s outlook and will hinder paint’s absorption, thereby resulting in a
more fascinating model.
Lastly, the drying times are going to be quicker after applying primer to your models.
If the drying time will be more, it will be bad for your miniature models due to the granular lining exterior after the paint is applied.
The prime layer(s) will enhance models’ stability and a high unified bond with the surfaces.
It means that spraying paint onto the primed models will allow the paint to dry and set rapidly without forming the
shell.
Hence, no granular lining will be visible afterward which can be the case if we do not apply prime to our models beforehand.
What happens if you don’t prime before painting?
If you don’t prime before painting, there will be nothing that acts as the bridge between the model and the paint. This would cause more uneven tone color, cracks, and imperfections on the final product. Furthermore, the paint wouldn’t dry fast leading to granular linings on the surface.
As priming helps paint layers’ adhesiveness to the miniature model’s surfaces, you cannot get the same results in the absence of priming your models.
For tons of individuals within the modeling industry, priming models are taken into account as a requirement and a must-do act before applying any paint layer.
They know very well the after-effects without applying the prime layer.
But one must be vigilant in putting a skinny layer rather than a thick layer for creating the model base more robust and sturdier.
Without using primer on your miniature models, the paint will form a shell around your painted model and it will not adhere to the surface properly.
This suggests that primer acts as intermediary support between your miniature model and the paint layer.
If for any odd reason, your painted model will get dropped from a particular height, cracks are going to be easily visible due to the paint layer’s bad adherence level onto the model’s surface and it could literally peel off in chunks.
Priming models help the highest layer of paint to reinforce stickiness and therefore the paint layer set better onto your primed model.
It also means without using primer on your miniature models, you are definitely risking the after-sale and therefore the customers might return your product or do not come.
The looks of your miniature models are going to be terrible in the absence of prime. Hence, priming models is considered a secure bet while knowing the fierce competition in plastic models.
It establishes the strong relationship between the model’s surface and the layers of paint for which the survival period
increases.
Additionally, the greasy material on any model can be easily escaped using priming for better paint grip.

“Only the things I love”
thediecastmodel.com is reader-supported. When you buy through links on the site, I earn an affiliate commission.
So, here are the things I love when taking care of my Diecast Models.
Cleaning the Models
The first we are going to talk about is cleaning the models.
Removing Dust
- Air Brush – For me, this is the best since it not just removes dust but you can use it in painting/clear coating.
- Air Duster – This is a good alternative to Airbrush
- Normal Brush – If you are short on budget, you can use a normal brush. However, make sure that the brush has soft bristles because there are some hard brushes than can cause scratches. That’s why I recommended a good brush that can do the job properly.
Cleaning and Shining Hacks
Well, here are some of my cleaning hacks for removing scratches, oxidation, and so much more.
- Removing Decal Adhesive – Use Goo Gone on those hard-to-remove decal adhesives. It works fast and works like charm!
- Waxing and Polishing – Here is something a lot of people don’t know. Waxing protects the clear coat and paint while polishing shines the model. Instead of buying it separately, use a 2 in 1 to save money. Get this instead.
- Beginner Wax – The wax I recommended earlier is good and provides the best results based on my experience. But a beginner might have a problem especially if they’re not good at applying wax. Solid wax reaching hard to reach surface can be hard to remove. You have two choices here. One is to use a qtips to reach those surfaces, another is to use a liquid wax I recommended.
- Cleaning Wheels, Rubber, Plastic – Do not forget that rubber and plastic surface are quite different, especially in the cleaning process. Just wiping it down won’t do the job. That’s why I use Meguiar’s Vinyl and Rubber Cleaner and Conditioner. Works like charm!
- Make the Wheels Shine! – Making our models look good won’t be complete without tiny details such as shiny wheels! Do not forget this because however small this is, the difference can be as big as night and day.
- Remove Scratches Easily – Tiny scratches are not the end for your model. Here is a simple trick I’ve been using to make my models look scratch-free even without repainting. Use T-Cut.
Painting the Models
Painting Tools
Make sure when you paint models, have these ready.
- Tape – A tape is important if you are painting a straight line. Furthermore, it will prevent your paint to scatter on other parts. I recommend Tamiya Tape since it is really made for models. Furthermore, they stick really well preventing paint splatters.
- Brush (Beginner) – Find a good set of brushes to paint your models. Of course, you can opt for an airbrush but it’s quite expensive.
- Airbrush (Intermediate/Expert) – This will yield a significantly better result than an ordinary brush because you can easily spray the paint evenly. I recommend this if you know what you’re doing.
- Stand(Optional) – Stands are good because it can be hard to manually hold the models while painting. It is optional but in my opinion, the price is well worth it for the comfort it gives.
- Drop Cloths – Drop Cloths will protect your surroundings from the paint.
- Primer – The most common beginner mistake I see is painting models without any Primer. A primer will prevent imperfections such as bubbles or paint not sticking to your models. It is a small price to pay for quality results.
- Clear Coat – A clear coat will protect the paint of your models. This will make the paint last longer. Also, it is the one responsible for making your models shine.
Paints
Of course, you can’t do painting properly without paint. So here are the ones I recommend.
- Acrylic Paint – Good for beginners because it dries quickly. However, it doesn’t produce results as good as enamel paint.
- Enamel Paint – Provides a good quality finish and longer-lasting paint. However, it takes longer to dry and requires expertise to use.
Model Maintenance
Model Storage
- Simple Wood Cabinet – While it doesn’t let you display your models, wooden cabinets are good storage for these models. For one, they are not heat conductors which means that the temperature inside will remain constant and remain cool. Furthermore, they prevent light from reaching the models which can cause oxidation.
- Clear Cabinet with Lock – If you want to display your models, then I recommend this. It closes so dust won’t easily get to your models. I also recommend you don’t put more than 1 model in each compartment since metals are good conductors of heat.
Model Photography
So you want to show off your models to others? Well, I got you covered.
Here is my beginner-friendly model photography tutorial that teaches everything from taking pictures to the editing process.
You will also see me doing hands-on photography in that tutorial.
Here is the link: How to Take Pictures of a Diecast Model or Model Kit | Helpful Illustrated and Video Guide

