How to take pictures of a model car | A Helpful Illustrated and Video Guide
In this blog post, I am going to show you how to take good pictures of your model car. This is a very beginner-friendly method of taking pictures. This method can be used for model kits and diecast cars. Plus, I have included a simple video tutorial for you to start taking photos of your model car.
To take good pictures of a model car, you need to remember that good lighting and a camera is key. Good lighting won’t make any harsh shadows in the photo. Furthermore, a good camera would make the best color balance so you don’t need to mess up in the editing process.
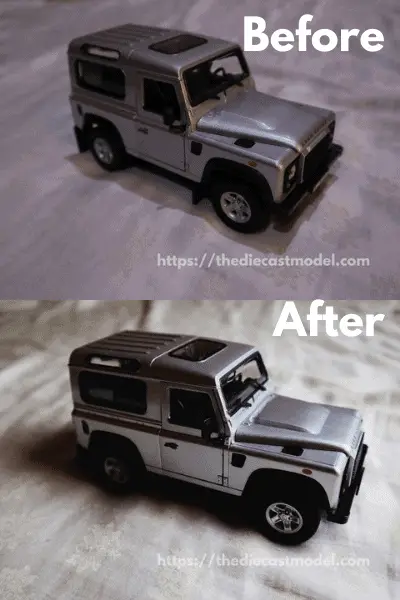
This car photo-taking method can also be used in motorcycles, aircraft, and any other models. However, my example here is for a model car. Let us start this blog post with the before and after photos.
To make it easier to follow, I’ve made a video for you to follow along. I also need to do this to prove to you that I use the items I will recommend here.
I covered all the basics including the things you need to take good photos and a beginner’s guide to editing. It is so simple that every beginner can start taking good model car pictures in just a day.
So, here are the things you need to start taking pictures of your model car.
| Item | Comment | Where to Find |
| Canon EOS M100 | Cheaper than Other Cameras, Good Color Quality (Recommended) | Check on Amazon |
| Phone Camera | Won’t make the same Photo Quality as Real Camera | Check on Amazon |
| Large Softbox | What I used in the video, good for indoor photography | Check on Amazon |
| Small Softbox | Can be used for Outside Photography (Recommended) | Check on Amazon |
| 64 Led Light | Portable, not recommended since it provides hard light | Check on Amazon |
| Kraft Paper | Used for cheap background change (Recommended) | Check on Amazon |
| Mini Photo Studio | For easy photo shoots, not recommended since it limits creativity | Check on Amazon |
You would not know why I don’t really like led lights in model car photography. It is just a personal opinion.
Also, you don’t need to get expensive cameras. As I said, you only need the Canon EOS M100. Other camera models are more expensive because they have an audio input which we don’t need since we are only going to take photos.
I really recommend starting with the camera I used since it has already been tried and tested. The quality is just way better than taking pictures with your phone.
As an example, my video was taken using my phone camera and as you can see, it is very grainy which is what we are preventing when taking model car photos.
If you’re set on using a phone camera, the only one I recommend is to take car model photos with Samsung S series. The reason is I have tried and tested their phone and I was impressed with the photo quality
This is what you’ll buy in order of priority.
- Small Soft Box
- Large Soft Box
- Camera
Having the best camera without a proper light source will be useless. So, it should be your priority.
In fact, I would prefer you to have a good light source and use your phone camera than having a real camera without a light source.
Tip#1: Have a Good Lighting Source
You can have the best camera out there but it won’t produce good results if you don’t have a proper light source.
In choosing a good light source. It is important that you should aim for a good light source that doesn’t give any harsh shadows.
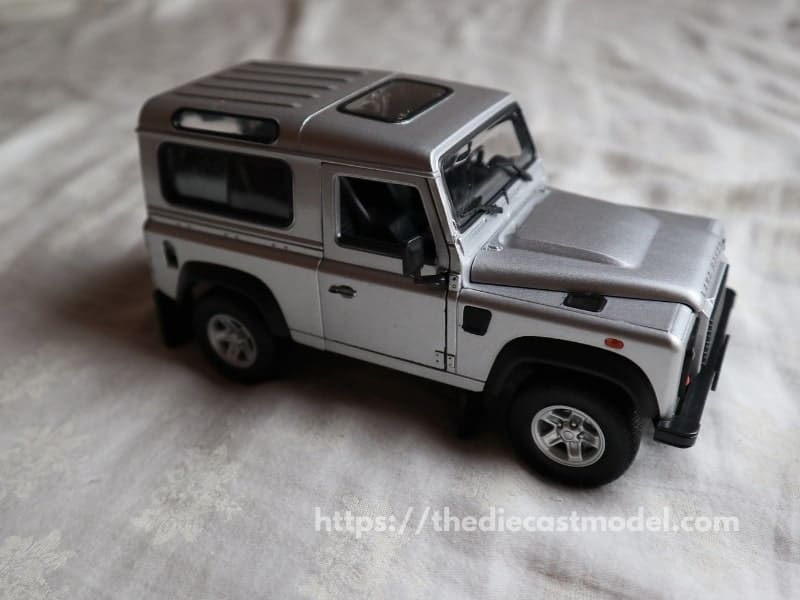
In the before photo, you can see the shadows are straight. This is a sign of harsh light. Furthermore, another sign of a harsh light source is the shadows are darker.
In other photography terms, harsh light is also known as hard light. Soft light is the opposite which is a not too much harsh light source.
Remember that in the after, it might seem like the shadows are too much but take note that it is because of the edit we did together in the video.
In general, the lighting source that will produce the least harsh light is the large softbox. However, the disadvantage you would have is it is less portable. A softbox is portable but would actually produce some harsh light.
In general, Led lights produce the harshest lights.
| Light Source | Light | Portability |
| Large Softbox | Soft Light Source | Not portable |
| Small Softbox | Medium | Portable |
| Led Lights | Hard Light Source | Portable |
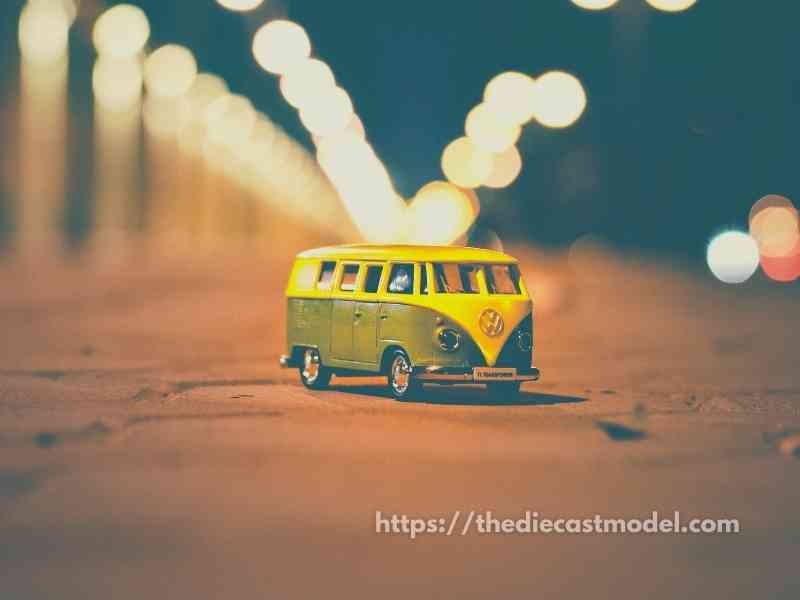
That’s why I recommend getting a Small Softbox first especially if you plan to take photos outside. Here is a sample photo outside using a small softbox.
But if only plan to take photos at home, then I recommend getting the large softbox for the best results. it gives the softest light possible.
Good lighting also prevents noise which is the tiny dots you’ll see in a photo. We do not want any of those in our photos.
Preventing noise is as easy as getting a good camera, and a good light source.
That’s why I always tell you to get a real camera. Not only do they produce less to no noise/grain but they also produce more vibrant colors in a photo.
Also, do not use a flashlight. It produces extremely harsh light which is harsher than the LED light I’ve recommended.
That’s also why I am not putting that in the recommended gear table.
Tip#2: Remove other Lighting Source
You can have the best light source but if you don’t cut off other light sources, it won’t produce a good photo.
The darker the area is, the better.
This step is very important that I showed closing all light sources in the video including the light in my room and trying to cancel out as much light as possible from my window.
The reason is simple. Another light source can interfere with the light effects.
Here is a sample of taking pictures with another light source.
Here is a photo with as little external light source as possible.
As you can see, the colors and shadows are extremely different from each other.
Take note that the photo was taken raw. This means that the photo above still doesn’t have any edits. Which we will do later.
I am going to give you a simple editing guide to make your photos more cinematic.
Tip#3: Take at least 10 Photos
In model photography, it is important to take as many photos as possible. This gives you many choices to choose from in the editing process. Even the expert photographers do this even if they’re already good. It is recommended to get at least 10 photos.
This is a common mistake for beginners. The thing is every photographer even the best ones take multiple photos.
The reason is that there will always be more to choose from if you took many photos. Even experienced ones will do so because they know that it is good to have a lot of photos to choose from.
In my video, I only took a few ones since I am just teaching basic photography. But in actual scenarios, take at least 10. No matter how good you are, always take more.
We usually have a simple rule in videography and photography. Only take the best 20%. This means that in 10 photos, take only 2.
Try multiple angle shots. Try changing the car’s location.
Basically, the more the better.
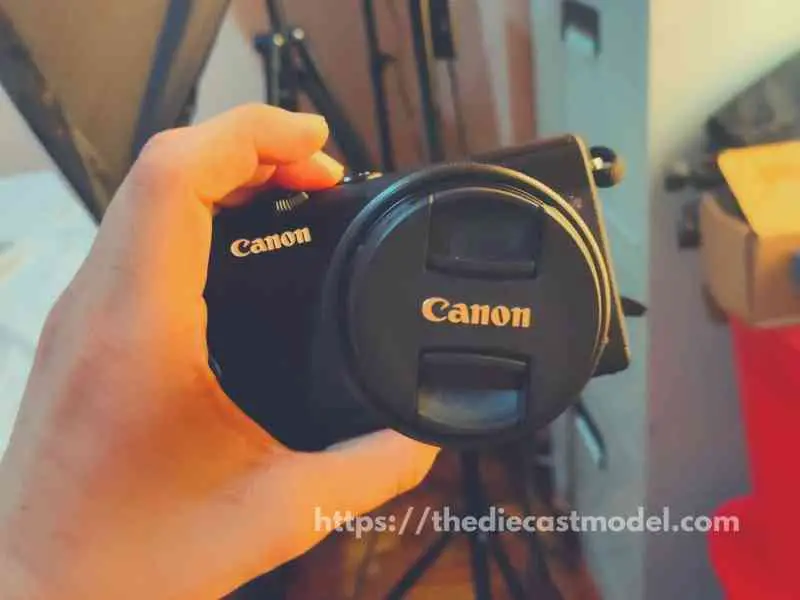
I am recommending getting this camera simply because I think it’s one of the best budget cameras out there.
You do not need to get expensive ones since we are not doing any video taking. If your goal is to take photos, this budget camera is enough.
No need to buy the most expensive ones.
You also don’t need to do lots of color correction on the editing process since it is most likely color balanced by the camera.
The fewer edits, the better.
That’s why I recommend this for beginners.
Tip#4: Join Model Car Photography Groups
Join model car photography groups online as you can easily find some inspiration and clever ways to take a picture of a model car. You can easily find these groups on Reddit or other forums. This will give you lots of ideas to choose from in your next photo shoot.
Here is a cool tip I always do.
When you’re not doing anything, go to forums where people share their model car photos.
This is especially useful to get some ideas on how to take photos.
Try to get inspiration from others. Try what works for them and what looks cool for you.
For example, if you prefer having a black background then start taking photos on a dark background.
I am going to show you a cool tip later on how to change backgrounds on a photo shoot at a cheap price.
Tip#5: Learn Basic Photo Editing
Taking your photo in a well-lit environment while taking multiple photos will surely give you some photos that are worth posting or sharing.
But we are only 80% done. The other 20% comes with editing.
If you followed my instructions to take photos in a well-lit environment and good camera, editing will just be a few presses of a button like what we’ve done in the video.
You can do many edits such as color corrections, filters, and many more.
I thought of that but I want to teach you something using a program used by real photographers.
And what I teach works 95% of the time to create a more cinematic look on your photos. Something that can be done with just 1 minute and will instantly make your photos extremely good.
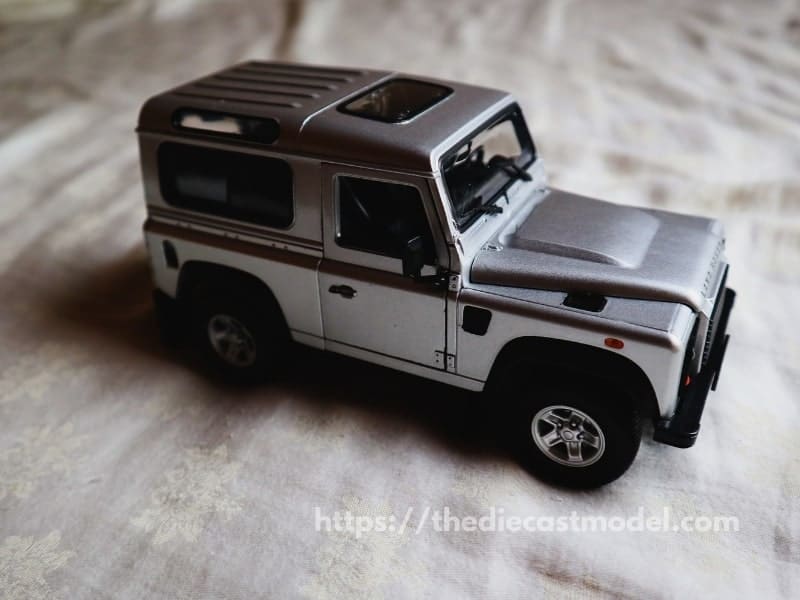
Note that this picture didn’t take me 10 tries which I recommended I only took 2 photos for demo purposes.
So we can safely assume that I can actually make something better than this.
For the editing tutorial, check the Video I’ve attached with this article.
Also, here is a simple rule in editing.
The fewer edits the better.
Don’t go overboard with filters and such. We want a natural look. The simple edit I’ve taught you would already give a big difference.
It’s not wrong to try something new, but don’t expect more edits means better quality.
That’s why 80% is in the photo-taking process. Good lighting, camera, and angle are key.
Tip#6: Car Background Tip
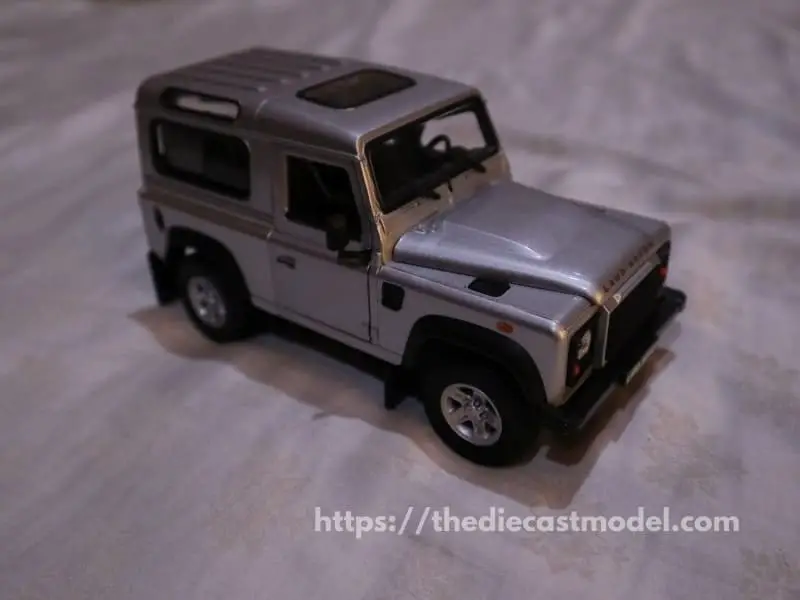
In the video, I took the photo in the bed because I can’t go outside.
But even if I took the photo in the bed, the outcome is actually pretty good even if I didn’t try taking 10 photos with different angles.
However, sometimes we want things to spice up like taking a photo on a different background such as this.

This type of photo is not hard to do.
In fact, you can do it in a cheaper way.
Use the Kraft Paper I’ve recommended in the table above. The size is enough for you to change the background then angle the camera to just see the background.
Also, the Kraft Paper I’ve placed has multiple colors to choose from.
This is a simple hack in order for you to do something like this. But do not forget that it is important to still check the lighting.
Tip#7: Use a Mini Studio Light Box
If you want the easiest way to get good photos, then buy a mini studio lightbox.
It has lighting specifically placed to make the best results.
However, it is only good for a beginner.
If you want to get better, you need to be creative. That’s why I am teaching you how to properly take pictures.
Plus, you can’t take good pictures outside since you’ll only take pictures inside the mini-studio.
Thus, make your own studio. It’s worth it. The sky is your limit.
Don’t limit your creativity.
But if you’re set on the mini-studio, then I recommend this one. It is cheap but provides good photos.

Tip#8: Smartphone is good for beginners
In model car photography, the most important thing to remember is that lighting is key.
Lighting will provide the best photo a camera can give which includes smartphones.
Smartphones are a good way to take pictures especially if you already know how to properly light up your photo.
Just follow the steps here and I am sure you’ll still make good photos with your smartphone.
However, as I said, getting to the next level requires you to get a good camera. That’s why I recommended a good budget camera.
But if you’re looking for the best smartphone for these photoshoots. I had some good experiences with the Samsung S series phone.
Their photo quality is so good and it is just a little behind the actual camera.
For other smartphone models, I can’t give a proper recommendation since I don’t personally use them.
But I still recommend getting a decent camera.
No need for a special lens except the telescopic if you’re a fan of good zoom-ins.

“Only the things I love”
thediecastmodel.com is reader-supported. When you buy through links on the site, I earn an affiliate commission.
So, here are the things I love when taking care of my Diecast Models.
Cleaning the Models
The first we are going to talk about is cleaning the models.
Removing Dust
- Air Brush – For me, this is the best since it not just removes dust but you can use it in painting/clear coating.
- Air Duster – This is a good alternative to Airbrush
- Normal Brush – If you are short on budget, you can use a normal brush. However, make sure that the brush has soft bristles because there are some hard brushes than can cause scratches. That’s why I recommended a good brush that can do the job properly.
Cleaning and Shining Hacks
Well, here are some of my cleaning hacks for removing scratches, oxidation, and so much more.
- Removing Decal Adhesive – Use Goo Gone on those hard-to-remove decal adhesives. It works fast and works like charm!
- Waxing and Polishing – Here is something a lot of people don’t know. Waxing protects the clear coat and paint while polishing shines the model. Instead of buying it separately, use a 2 in 1 to save money. Get this instead.
- Beginner Wax – The wax I recommended earlier is good and provides the best results based on my experience. But a beginner might have a problem especially if they’re not good at applying wax. Solid wax reaching hard to reach surface can be hard to remove. You have two choices here. One is to use a qtips to reach those surfaces, another is to use a liquid wax I recommended.
- Cleaning Wheels, Rubber, Plastic – Do not forget that rubber and plastic surface are quite different, especially in the cleaning process. Just wiping it down won’t do the job. That’s why I use Meguiar’s Vinyl and Rubber Cleaner and Conditioner. Works like charm!
- Make the Wheels Shine! – Making our models look good won’t be complete without tiny details such as shiny wheels! Do not forget this because however small this is, the difference can be as big as night and day.
- Remove Scratches Easily – Tiny scratches are not the end for your model. Here is a simple trick I’ve been using to make my models look scratch-free even without repainting. Use T-Cut.
Painting the Models
Painting Tools
Make sure when you paint models, have these ready.
- Tape – A tape is important if you are painting a straight line. Furthermore, it will prevent your paint to scatter on other parts. I recommend Tamiya Tape since it is really made for models. Furthermore, they stick really well preventing paint splatters.
- Brush (Beginner) – Find a good set of brushes to paint your models. Of course, you can opt for an airbrush but it’s quite expensive.
- Airbrush (Intermediate/Expert) – This will yield a significantly better result than an ordinary brush because you can easily spray the paint evenly. I recommend this if you know what you’re doing.
- Stand(Optional) – Stands are good because it can be hard to manually hold the models while painting. It is optional but in my opinion, the price is well worth it for the comfort it gives.
- Drop Cloths – Drop Cloths will protect your surroundings from the paint.
- Primer – The most common beginner mistake I see is painting models without any Primer. A primer will prevent imperfections such as bubbles or paint not sticking to your models. It is a small price to pay for quality results.
- Clear Coat – A clear coat will protect the paint of your models. This will make the paint last longer. Also, it is the one responsible for making your models shine.
Paints
Of course, you can’t do painting properly without paint. So here are the ones I recommend.
- Acrylic Paint – Good for beginners because it dries quickly. However, it doesn’t produce results as good as enamel paint.
- Enamel Paint – Provides a good quality finish and longer-lasting paint. However, it takes longer to dry and requires expertise to use.
Model Maintenance
Model Storage
- Simple Wood Cabinet – While it doesn’t let you display your models, wooden cabinets are good storage for these models. For one, they are not heat conductors which means that the temperature inside will remain constant and remain cool. Furthermore, they prevent light from reaching the models which can cause oxidation.
- Clear Cabinet with Lock – If you want to display your models, then I recommend this. It closes so dust won’t easily get to your models. I also recommend you don’t put more than 1 model in each compartment since metals are good conductors of heat.
Model Photography
So you want to show off your models to others? Well, I got you covered.
Here is my beginner-friendly model photography tutorial that teaches everything from taking pictures to the editing process.
You will also see me doing hands-on photography in that tutorial.
Here is the link: How to Take Pictures of a Diecast Model or Model Kit | Helpful Illustrated and Video Guide