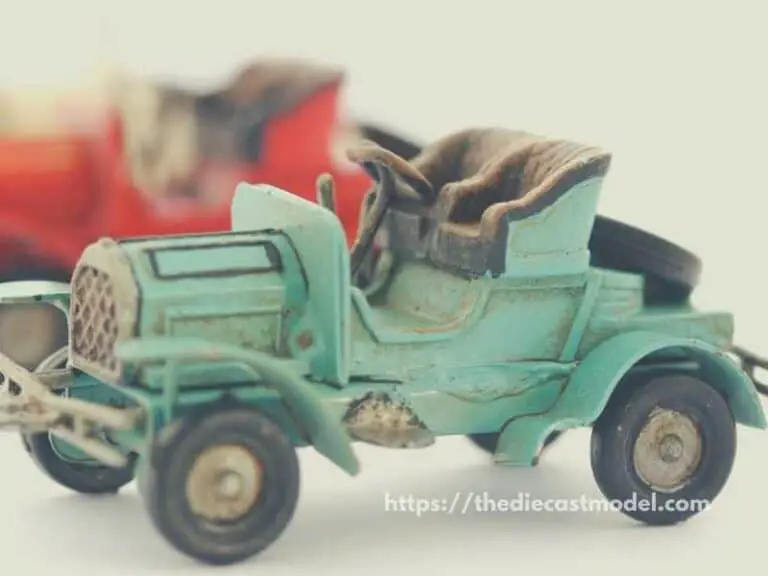
How To Remove Dust From A Model: Complete Maintenance Tutorial
Like everything important in life, your models need to be maintained. As a collector, one of our prizes possession is our models. However, you need maintenance especially if you plan to sell them in the future. If you don’t clean them, dust and rust will ruin your models. Thus, it is very important to know how you can remove dust from your models.
To remove dust from your model, you first need to clean or remove dust by using an airbrush, air duster, or a simple brush. After that, remember to polish for deep clearning. Lastly, try putting some wax on in order to prevent dust sticking in the future.
This post is therefore written for hobbyists who have or are willing to develop a maintenance culture. Maintenance culture as regarding model preservation refers to a modeler’s or hobbyist’s values, paradigms (way of thinking & behavior), perception, and underlying assumptions that believe maintenance to be a top priority and practice it in their lives and their diecast collection.

How do you remove dust from a model?
Here is the 3 step process in removing dust from your model:
- Cleaning to remove dust
- Polish for deep cleaning
- Waxing to prevent dusts in the future
These strategies work if you adhere to the suggested methodology.
These step-by-step cleaning instructions will help you keep your small models in tip-top shape.
Cleaning, polishing, and waxing are all part of the best care plan for keeping these treasures in tip-top shape.
It’s time for the next generation of collectors to benefit from what I know.
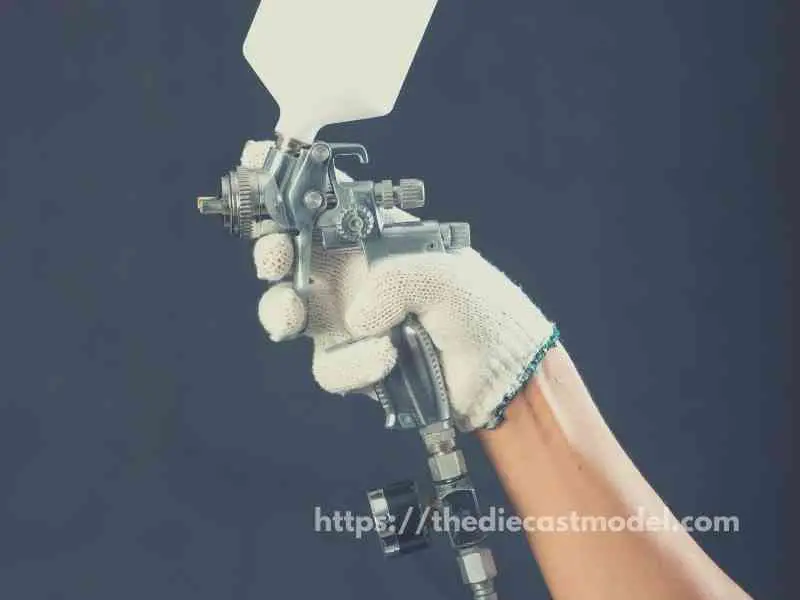
Airbrush
Take your model it gently mists the dust mixture around the lower areas of the vehicle. And up the sides.
Set your airbrush to low power and use wide diffuse strokes.
In my opinion, airbrush are the best ones to use simply because the risk of scratching the paint of your model will be extremely minimized.
It can also reach hard to reach surface which is ideal for dusting a model.
Also, you can get an airbrush with compressor so you can also use it to paint models (See Recommendations below)

Air Duster
Use this to remove the essential layers of dust and anything else that has accumulated.
You may buy canned air equivalents or go large and get the high-end version, which is quite handy in general.
Air duster is a good alternative, however it will be hard to dust hard to reach surfaces of the model. Thus, it doesn’t provide as much deep clean as an air brush.
Brushes
Brushes are quite awesome and anyone is fine. Ranging from small paintbrushes to the preferred Makeup Brushes.
These brushes are very comfortable to handle and affordable to get..
Even with glass housing, the most accomplished collector knows that leaving models alone is not an option because they are vulnerable to dust and environmental degradation.
This will not only make your collection look dirty and unkempt, but it will also damage the finish.
I also recommend Tamiya brush since it’s specifically made for models. Plus, they aren’t harsh to the paint.
| Comments | Recommended Product | |
| Air Brush | Best in Cleaning | Check on Amazon |
| Air Duster | Good Alternative to Air Brush | Check on Amazon |
| Brush | Cheap | Check on Amazon |
Steps On How To Remove Dust Out Of A Model
1. The Model’s Ultimate Cleaning Routine
Cleaning your airplane and automobile models should be done with care, caution, and gentleness.
Miniature models of cars, planes, and trains, for example, are extremely delicate.
When cleaning them, you must handle them with extreme caution. Otherwise, you risk breaking or snagging sensitive elements (such as antennas) or causing surface dents.
The key is to avoid over-cleaning the models by not rubbing them too hard.
Chrome-plated parts, for example, should not be wiped with a moist cloth excessively. I’m aware that the chrome plates are rust-resistant, according to the manufacturer.
However, I’ve discovered that prolonged exposure to water causes the chrome’s glossiness to fade. As a result, you should avoid cleaning certain regions when cleaning the model.
During the cleaning procedure, a moderate wipe will suffice to remove the dust.
What else is there to say?
You can follow this step-by-step guideline to clean your model planes and cars:
Preparation
- Before you begin, remove any removable parts. This makes cleaning easier and more manageable.
- Before you use your cleaning instruments, blow away the dust.
- With a good cleaning brush, remove the surface dust.
Cleaning Procedures
- You can clean every nook and corner of the vehicle with Q-tips or a little brush. Make sure your detail pieces are completely covered. You wouldn’t want dust to build up in between curves because it’s difficult to remove over time.
- Clean the wheels, opening panels, and other parts of the model with the same cleaning tool.
- Then, using distilled water, moisten the edge of your microfiber cloth. (Make sure it doesn’t spill!)
- Wipe the surface of your tiny vehicle with a damp cloth to remove any dust that has clung to it.
- Avoid troublesome areas such as antennas, little details, and any model add-ons.
- A Q-tip or toothbrush can be used to clean the inside and hard-to-remove impurities. The goal is to have a piece of cleaning equipment that allows you to access the model car/interior. The plane’s When compared to the cloth, the small design of these instruments makes them a better match.
- After that, use a dry microfiber towel to polish the diecast and paint it. Wipe the car slowly and carefully with it, just as you would with wet cleaning.
- When you’re finished, make sure the model is thoroughly dry.
Expert Tip: Steps 6-11 can be used on a regular basis for cleaning.
Waxing and finishing
- Examine your model for any flaws that require quick repair. It might be anything from peeling paint to chipped parts.
- Choose a good cleaning solution that doesn’t contain any heavy-duty automotive chemicals. Due to its toxic ingredients, the latter may force your model’s paint to be harmed.
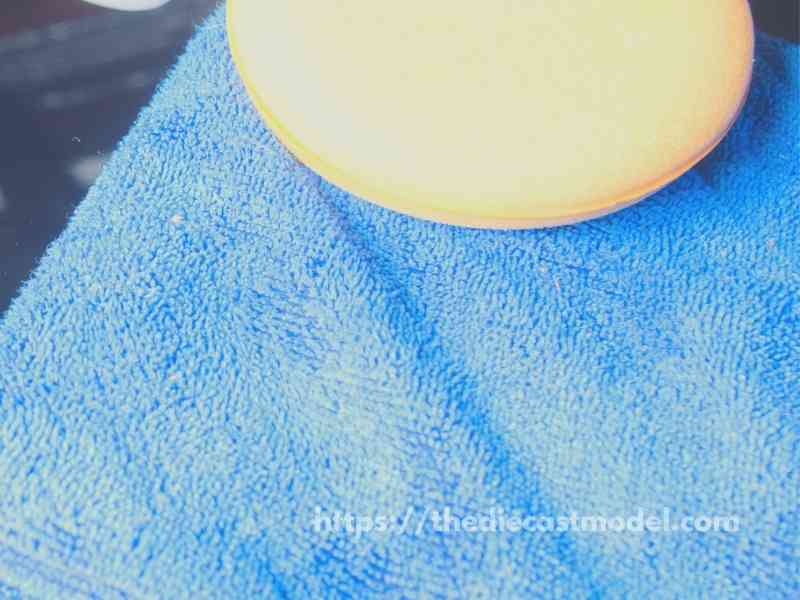
- Using a clean microfiber cloth, apply a few drops of your cleaning solution.
- Polish your model by wiping a moist rag along the surface in a straight line.
- Stripes and other painted areas should not be polished because the solvent may remove them.
- After that, apply a model-friendly wax that fits your needs.
- Wax your model one part at a time after applying it to the cloth.
- Unless otherwise specified in the user’s manual, avoid clad-black regions and chrome plating. If you can’t clean the model without these pieces, you can test the wax on them.
Model Specification
- On the Q-tip, squirt a little detail spray.
- Rub the cotton tip around minor areas of your model, such as the wheels, seams, and curves.
- If you dampen the spots too much, the shiny finish may be damaged.
- Finally, buff the model with a microfiber cloth. If necessary, re-spray the cleaning cloth with the solution. It’s best not to apply the spray or wax directly on the model because it could damage the colored finish.
- That concludes our discussion. Your model is now ready to return to the display shelf.
- Pro tip: Clean your tiny cars once or twice a month to avoid dusty layers destroying the paintwork.
2. Cleaning Recommendations
A Cleaning Kit for Collectors
Getting a cleaning kit is good but it’s not necessary. However, getting a cleaning kit will give you enough of everything to start cleaning your model.
That’s why you don’t need to buy things separately if you choose to get a cleaning kit.
Here is the cleaning kit I recommend.
However, do not use the kit without checking out the instructions below.
Here’s a glance at what’s in the cleaning kit:
- To cleanse and polish the models, use environmentally acceptable cleaning chemicals.
- Cleaning brush with a soft, medium-sized bristle that can be used to remove surface dust.
- For dusting off specific spots, use a small cosmetics brush or a plastic paintbrush.
- To clean the hiding places of your exteriors and interiors, use Q-tips.
- Cleaning and polishing with a microfiber cloth.
- A light wax that can be used on model planes and automobiles. (If you want to keep your furniture looking new, don’t use furniture wax or polish.)
- For the finishing touch, use a professional detail spray.
Expert Advice: Always wipe the cleaning instruments after you’re finished. Additionally, when cleaning the models, avoid using old wax and polishes. These products can cause clumps to grow on the surface, causing the shiny appearance to be distorted.
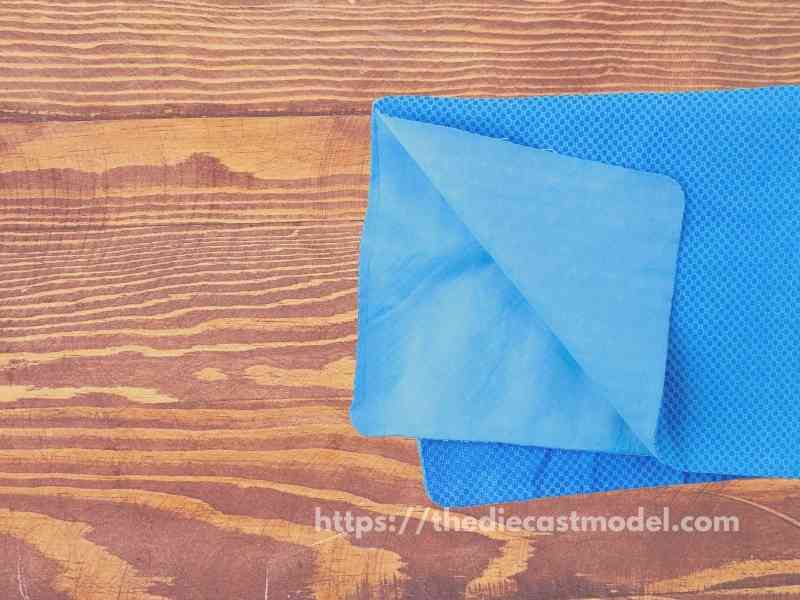
Choosing the Right Cloth
When I first started collecting model automobiles and planes, I assumed that dusting them with a paper towel would be enough.
I used to do brief dusting sessions with a huge old feather duster every now and again.
Although the results were not ideal, they were adequate for a quick clean.
This is due to the fact that they did not damage the paint or finish on my miniatures.
However, over time, I’ve discovered that using the right cloth extends the life of my diecast model vehicles.
The correct cleaning equipment can remove dust remnants that a duster and paper towels can’t reach.
What kind of cleaning towel do I prefer? Mr. Siga Microfiber Cleaning Cloth is my favorite. The cleaning cloth can be purchased in bulk, which is convenient if you have a large collection.
Because the material is non-abrasive and soft, it won’t scratch your models’ surfaces. It’s also very absorbent, making washing your automobile a breeze.
3. Unique Storage Area
You don’t want the dust to accumulate on top of your automobiles, do you?
I kept my collectibles wrapped and stored for years to keep them secure. This method is unsatisfactory because the models are seldom seen while they are fully clothed.
You also miss out on the opportunity to show off your extensive collection.
As a result, the ideal option is to pick an accessible location that isn’t too “out there.”
That means avoiding direct sunlight and staying out of high-traffic areas. Keeping the collectible in a glass cabinet is one method to achieve this.
Preserve your collectibles against dust and environmental damage with enclosed cases. They also provide you the freedom to show off your beautiful collection without fear of being judged.
The best place to showcase your tiny models is somewhere cool and dry. You don’t want automobiles to be harmed by the environment. Also, pick a spot that isn’t too close to the window.
The models will be shielded from direct sunlight as a result of this. This helps to keep the paint from fading due to UV light. It also prevents bacteria and airborne particles from polluting your models.
Even if your display is open-style, the location is crucial.
So, when it comes to choosing a location for your collection, you can use the same tips as before.
Recommended Storage Cabinets
I have 2 options for you. The reason why 2 is because it depends on your preference. One is for showing off while maintaining them, and another is purely for maintaining.

This one prevents light to prevent damage to the paint. Many people don’t know but sunlight or plain light can actually harm a model car’s paint in the long run. Plus, it is made of wood to prevent any temperature fluctuations.

This is considered to be more balanced since you can show off your models to visitors. But do not put all the models tightly packed together. The reason is these models are still made of metals which is a conductor of heat. My recommendation is only 1 model per slot.
Cause Of Dust To A Model
The tiny, sometimes invisible particles carried by air called dust are created in the atmosphere by saltation and sandblasting of sand-sized grains, which are transported through the troposphere.
Dust in the air is categorized as an aerosol, and it can generate significant local radiative forcing in the atmosphere.
Airborne Dust Particles can come from pretty much anywhere, any movement or activity can cause a large number of excess particles in the air. Here are some of the sources of dust:
- Disturbed vacant or open lands
- Construction and mining activity
- Landscaping maintenance activity
- Industrial sources
- Fires: fireplace, camp, forest
- Charcoal or wood-burning barbecues – Off-road vehicle activity
- Unpaved and paved roads, parking lots – Diesel exhaust
Conclusion
Finally, the right cleaning tools, a unique storage method, and a thorough cleaning program may ensure that your models are well-protected for a long time.
The key is to go slowly and steadily until you’ve mastered this cleaning technique.
You don’t want to end up with damaged parts as a result of your haste.
I’m confident that with practice, you’ll be able to clean and detail these miniatures without causing any damage.
Keep an eye out for more DIY tips and reviews from yours truly in the future!

“Only the things I love”
thediecastmodel.com is reader-supported. When you buy through links on the site, I earn an affiliate commission.
So, here are the things I love when taking care of my Diecast Models.
Cleaning the Models
The first we are going to talk about is cleaning the models.
Removing Dust
- Air Brush – For me, this is the best since it not just removes dust but you can use it in painting/clear coating.
- Air Duster – This is a good alternative to Airbrush
- Normal Brush – If you are short on budget, you can use a normal brush. However, make sure that the brush has soft bristles because there are some hard brushes than can cause scratches. That’s why I recommended a good brush that can do the job properly.
Cleaning and Shining Hacks
Well, here are some of my cleaning hacks for removing scratches, oxidation, and so much more.
- Removing Decal Adhesive – Use Goo Gone on those hard-to-remove decal adhesives. It works fast and works like charm!
- Waxing and Polishing – Here is something a lot of people don’t know. Waxing protects the clear coat and paint while polishing shines the model. Instead of buying it separately, use a 2 in 1 to save money. Get this instead.
- Beginner Wax – The wax I recommended earlier is good and provides the best results based on my experience. But a beginner might have a problem especially if they’re not good at applying wax. Solid wax reaching hard to reach surface can be hard to remove. You have two choices here. One is to use a qtips to reach those surfaces, another is to use a liquid wax I recommended.
- Cleaning Wheels, Rubber, Plastic – Do not forget that rubber and plastic surface are quite different, especially in the cleaning process. Just wiping it down won’t do the job. That’s why I use Meguiar’s Vinyl and Rubber Cleaner and Conditioner. Works like charm!
- Make the Wheels Shine! – Making our models look good won’t be complete without tiny details such as shiny wheels! Do not forget this because however small this is, the difference can be as big as night and day.
- Remove Scratches Easily – Tiny scratches are not the end for your model. Here is a simple trick I’ve been using to make my models look scratch-free even without repainting. Use T-Cut.
Painting the Models
Painting Tools
Make sure when you paint models, have these ready.
- Tape – A tape is important if you are painting a straight line. Furthermore, it will prevent your paint to scatter on other parts. I recommend Tamiya Tape since it is really made for models. Furthermore, they stick really well preventing paint splatters.
- Brush (Beginner) – Find a good set of brushes to paint your models. Of course, you can opt for an airbrush but it’s quite expensive.
- Airbrush (Intermediate/Expert) – This will yield a significantly better result than an ordinary brush because you can easily spray the paint evenly. I recommend this if you know what you’re doing.
- Stand(Optional) – Stands are good because it can be hard to manually hold the models while painting. It is optional but in my opinion, the price is well worth it for the comfort it gives.
- Drop Cloths – Drop Cloths will protect your surroundings from the paint.
- Primer – The most common beginner mistake I see is painting models without any Primer. A primer will prevent imperfections such as bubbles or paint not sticking to your models. It is a small price to pay for quality results.
- Clear Coat – A clear coat will protect the paint of your models. This will make the paint last longer. Also, it is the one responsible for making your models shine.
Paints
Of course, you can’t do painting properly without paint. So here are the ones I recommend.
- Acrylic Paint – Good for beginners because it dries quickly. However, it doesn’t produce results as good as enamel paint.
- Enamel Paint – Provides a good quality finish and longer-lasting paint. However, it takes longer to dry and requires expertise to use.
Model Maintenance
Model Storage
- Simple Wood Cabinet – While it doesn’t let you display your models, wooden cabinets are good storage for these models. For one, they are not heat conductors which means that the temperature inside will remain constant and remain cool. Furthermore, they prevent light from reaching the models which can cause oxidation.
- Clear Cabinet with Lock – If you want to display your models, then I recommend this. It closes so dust won’t easily get to your models. I also recommend you don’t put more than 1 model in each compartment since metals are good conductors of heat.
Model Photography
So you want to show off your models to others? Well, I got you covered.
Here is my beginner-friendly model photography tutorial that teaches everything from taking pictures to the editing process.
You will also see me doing hands-on photography in that tutorial.
Here is the link: How to Take Pictures of a Diecast Model or Model Kit | Helpful Illustrated and Video Guide
Sources: