What are model ships made from?
Historically, ship modeling is as valuable as shipbuilding itself and astonishingly it dates back to the dawn of water transportation. Ship models have grave importance to archeologists. The ancient ship models provide them with helpful information about seafaring technology and the sociological and economic significance of seafaring of that time.
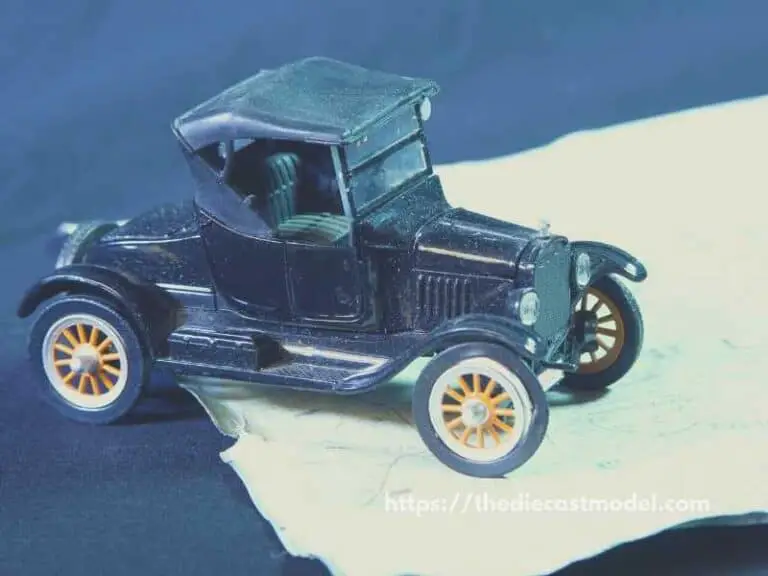
On the other hand, modern-era ship model kits are more focused on hobbyists and collectors that add glamour to their collection.
Model ships are usually made from wood, plastic, and metal. Wood is the oldest material used in ship models which have been around for thousands of years. Plastic ship models gave more fine details making them appear realistic. Lastly, metal model ships added sturdiness which plastic models don’t.
For a little bit of explanation here are what model ships are made from?
Types of ship models
These are the most commonly used materials for ship models:
- Wood: typically solid wood, two pieces of wood with a vertical seam, or slabs of wood stacked one on top of the other.
- Plastic: Models made of plastic, including injected styrene and cast resin. Fiberglass is frequently used for hull shells in larger scales (1/192 and larger).
- Metal: most commonly cast lead or other alloys. Steel, sheet tin, and aluminum brass are less widely used for hull construction but are extensively used for adding details.
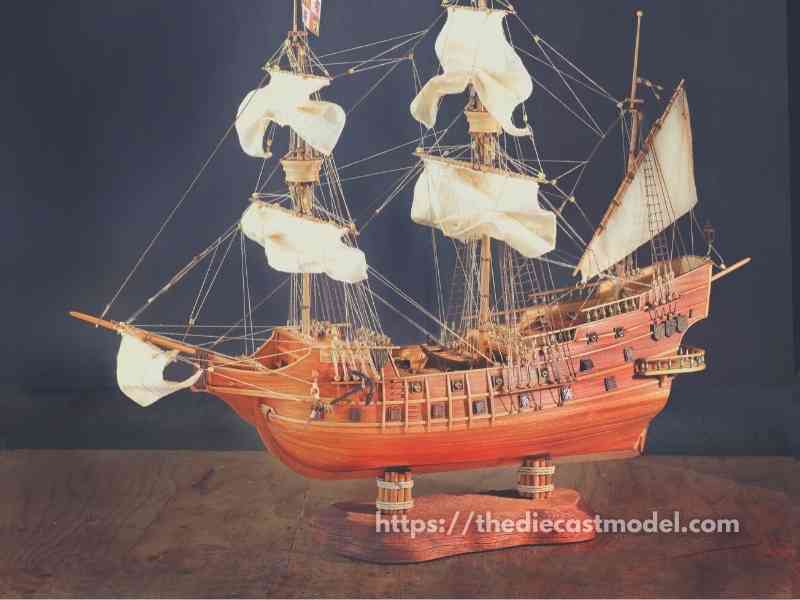
Wooden Model Ships
Wooden model ships are scale representations of ships made primarily of wood. The wooden model has been around for over two thousand years.
Wooden ship model hulls can be built in a variety of ways. The most basic is a solid wood hull sawn and carved from a single block of wood. To achieve accurate results, this method usually requires the highest level of skill.
Another variant of this technique is Bread and Butter technique, where the wood is the “bread,” and the glue is “butter.” The bread-and-butter technique refers to a hull constructed from thin blocks of wood that have been glued together either vertically or horizontally.
This decreases the amount of carving required but achieving an accurate hull form. The technique still requires skill and the use of templates.
A hollow hull can be used to achieve modeling precision and lightweight design. The plank on bulkhead technique involves inserting a series of shaped bulkheads along the keel to create a shaped stage covered with planks to form the model’s hull.
In the Plank on Frame technique, the model is built using plank on frame designs, just like a full-size wooden ship. The keel is laid down in such a way that it remains straight and true.
The sternpost and stem are installed, deadwood and strengthening pieces are inserted, and a series of shaped frames are built and installed along the keel to form the model’s internal framework.
The planks are then laid over the frame to create the external covering.
Many model shipwrights use the original vessel’s blueprints rather than plans designed specifically for models.
Drawings for the original ship can be taken to a blueprint service and blown up or reduced to fit the new scale. You can work directly from the original drawings by changing the scale each time you take a measurement.
Plastic Model Ships
Plastic injection-molded model ships have become increasingly popular in the decades following World War II. In contrast to traditional wooden models, these models are constructed from preformed plastic parts bonded with plastic cement.
Early on, the kits were designed for post-war children, who could glue them together in one afternoon and produce decent replicas
It is possible to purchase plastic model boats in both full hull and waterline versions. However, the quality of plastic model ships is not the same for all.
So, what distinguishes the best kits from others? Good research and attention to detail lead to historical accuracy.
The significance of historical accuracy has evolved over the years. The bar has been raised considerably. Some kits are out of scale but otherwise are of high quality. The larger the scale, the more noticeable this is.
The level of detail isn’t only the inclusion of details but also their proper placement. Many details are difficult to reproduce at a small scale and should be avoided.
This is one of those things that is difficult to pinpoint but becomes a nuisance when done incorrectly. What should be shiny, and what should be matte?
Should deck planks be demonstrated on a battleship on a 1:700 scale? When it comes to texture, it’s easy to tell when done incorrectly.
Airfix, Revell, Frog, and Pyro were among the early plastic model kit manufacturers. They have since been joined by Imai, Tamiya, Hasegawa, Skywave/Pit-Road, Trumpeter, Dragon Models Limited, and many others in producing a diverse range of model subjects.
Over the years, the focus of the plastic model kit market has shifted to adult hobbyists willing to pay for more elaborate, higher-quality kits. Specialized paints, decals, and turned metal replacement gun barrels are also available in newer models to make plastic models more accurate.
Metal Model Ships
Metal model ship production was a challenging task. In contrast to wood, which can be filed gradually to form an object, metal only allows for precise action.
Metal also necessitates the use of costly machinery. The ability to work with metal is essential when creating museum-quality model ships.
The tiny parts must be made of metal. The propellers should also be made of real brass for a museum-quality model. A model may appear good, but it is far from museum-quality due to inferior or fake materials and a lack of details.
But, everything is changed with the introduction of flat photo-etched metal sets, typically made of stainless steel or brass.
It allows for much more realistic lifelines, cranes, and other details than injection-molded plastic kits. These photos etch sets have pioneered the hobby, allowing fine-scale modelers to reproduce excellent details with far less effort.
Furthermore, metal model ships are more sturdy compared to plastic models. Which is ideal fro preserving a model.
Conclusion
Regardless of how useful ancient wooden ship models are to archaeologists, they are not always easily or correctly interpreted due to artists’ errors, ambiguity in model design, and wear and tear over time.
Still, those have their grandeur intact. On the other hand, metal model ships provide museum-quality precision with expensive equipment.
Metal model ships are mainly intended for ardent collectors, seasoned buyers, and museum curators. But, the real jackpot is Plastic model ships.
It was designed for post-war children, who could glue them together in one afternoon and produce decent replicas. It still works for today’s younger generation and adult collectors alike.
You can also buy both full hand and water-lined versions for a wide range of models at a reasonable price.
So, if you are a beginner collector or looking for some jaw-dropping present for your kids, plastic ship models are the best buy.

“Only the things I love”
thediecastmodel.com is reader-supported. When you buy through links on the site, I earn an affiliate commission.
So, here are the things I love when taking care of my Diecast Models.
Cleaning the Models
The first we are going to talk about is cleaning the models.
Removing Dust
- Air Brush – For me, this is the best since it not just removes dust but you can use it in painting/clear coating.
- Air Duster – This is a good alternative to Airbrush
- Normal Brush – If you are short on budget, you can use a normal brush. However, make sure that the brush has soft bristles because there are some hard brushes than can cause scratches. That’s why I recommended a good brush that can do the job properly.
Cleaning and Shining Hacks
Well, here are some of my cleaning hacks for removing scratches, oxidation, and so much more.
- Removing Decal Adhesive – Use Goo Gone on those hard-to-remove decal adhesives. It works fast and works like charm!
- Waxing and Polishing – Here is something a lot of people don’t know. Waxing protects the clear coat and paint while polishing shines the model. Instead of buying it separately, use a 2 in 1 to save money. Get this instead.
- Beginner Wax – The wax I recommended earlier is good and provides the best results based on my experience. But a beginner might have a problem especially if they’re not good at applying wax. Solid wax reaching hard to reach surface can be hard to remove. You have two choices here. One is to use a qtips to reach those surfaces, another is to use a liquid wax I recommended.
- Cleaning Wheels, Rubber, Plastic – Do not forget that rubber and plastic surface are quite different, especially in the cleaning process. Just wiping it down won’t do the job. That’s why I use Meguiar’s Vinyl and Rubber Cleaner and Conditioner. Works like charm!
- Make the Wheels Shine! – Making our models look good won’t be complete without tiny details such as shiny wheels! Do not forget this because however small this is, the difference can be as big as night and day.
- Remove Scratches Easily – Tiny scratches are not the end for your model. Here is a simple trick I’ve been using to make my models look scratch-free even without repainting. Use T-Cut.
Painting the Models
Painting Tools
Make sure when you paint models, have these ready.
- Tape – A tape is important if you are painting a straight line. Furthermore, it will prevent your paint to scatter on other parts. I recommend Tamiya Tape since it is really made for models. Furthermore, they stick really well preventing paint splatters.
- Brush (Beginner) – Find a good set of brushes to paint your models. Of course, you can opt for an airbrush but it’s quite expensive.
- Airbrush (Intermediate/Expert) – This will yield a significantly better result than an ordinary brush because you can easily spray the paint evenly. I recommend this if you know what you’re doing.
- Stand(Optional) – Stands are good because it can be hard to manually hold the models while painting. It is optional but in my opinion, the price is well worth it for the comfort it gives.
- Drop Cloths – Drop Cloths will protect your surroundings from the paint.
- Primer – The most common beginner mistake I see is painting models without any Primer. A primer will prevent imperfections such as bubbles or paint not sticking to your models. It is a small price to pay for quality results.
- Clear Coat – A clear coat will protect the paint of your models. This will make the paint last longer. Also, it is the one responsible for making your models shine.
Paints
Of course, you can’t do painting properly without paint. So here are the ones I recommend.
- Acrylic Paint – Good for beginners because it dries quickly. However, it doesn’t produce results as good as enamel paint.
- Enamel Paint – Provides a good quality finish and longer-lasting paint. However, it takes longer to dry and requires expertise to use.
Model Maintenance
Model Storage
- Simple Wood Cabinet – While it doesn’t let you display your models, wooden cabinets are good storage for these models. For one, they are not heat conductors which means that the temperature inside will remain constant and remain cool. Furthermore, they prevent light from reaching the models which can cause oxidation.
- Clear Cabinet with Lock – If you want to display your models, then I recommend this. It closes so dust won’t easily get to your models. I also recommend you don’t put more than 1 model in each compartment since metals are good conductors of heat.
Model Photography
So you want to show off your models to others? Well, I got you covered.
Here is my beginner-friendly model photography tutorial that teaches everything from taking pictures to the editing process.
You will also see me doing hands-on photography in that tutorial.
Here is the link: How to Take Pictures of a Diecast Model or Model Kit | Helpful Illustrated and Video Guide
Source