Tamiya Extra Thin Cement: How does it work?
One of the gluing materials you can use in model kits is the Tamiya extra thin cement. Thus, many people may wonder how this clear liquid works well in binding plastics together. So, how does the Tamiya extra thin cement work?
The Tamiya extra thin cement works by capillary action in which it flows quickly in narrow gaps or cracks due to its surface tension. This process fills the small gaps, and since it dries quickly, the extra thin cement can quickly set and glue plastics together, making it a good choice in the gluing process.
In this blog post, we are going to talk about the Tamiya extra thin cement. Its properties, how they work, their uses, and the disadvantages of using it. With these, you can use the extra thin adhesive with a complete understanding of how it works.
How does Tamiya extra thin cement work?
Tamiya’s extra thin cement is driven by ‘Capillary action.’
Capillary action refers to a liquid’s capacity to flow toward narrow gaps without the support of external forces.
The action causes liquid molecules to flow in narrow gaps or cracks due to surface tension and intermolecular forces between the liquid and the surrounding surface.
Different surfaces will have varying degrees of water molecule adhesion.
Tamiya’s extra thin cement makes effective use of this capillary action by filling every small gap between the two surfaces you’re attempting to join.
As the name says, this plastic cement is so thin that it essentially draws itself into the crack without you doing anything.
Extra thin plastic cement is thinner than water with a density of about 0.83 g/mL while water has a density of 1.0 g/mL. This makes it better at reaching small cracks making it ideal for joining small joints.
The extra thin cement works so effectively that you can simply hold the model together by applying the glue with a bit of brush (included in the cap) to the joint and waiting.
I like the Extra thin cement because it dries in only 40 seconds, faster than the regular plastic cement.
Tamiya Extra Thin Cement Properties
| Mode of Action | Capillary Action |
| Composition | 50% Butyl Acetate, 50% Acetone |
| Density | 0.83 g/cm3 |
| Used For | Gluing, Filling Cracks, Thinning |
| Undoing | Easy to Undo |
| Best For | Polystyrene Plastic |
| Color | Clear But Turns Cloudy in Time |
| Drying Time | 40 Seconds |
| Setting Time | 10 Seconds |
Alternatively, you can apply Tamiya Extra Thin Cement to a surface and let it dry.
When doing this, be sure to scrape most of it away from the bottle’s lip, using a swab of it.
The Tamiya Extra Thin Cement can (and will) identify cracks and seams in the model’s detail and run along with them if you overpour it.
The application process can be a real mess unless you are careful. The extra thin cement doesn’t take much to make a strong bind, so apply it wisely.
It’s much easier to apply Tamiya Extra Thin Cement precisely because of its capillary action.
You don’t need to attach anything permanently to get things done.
You can use rubber bands to hold things together. Then, as soon as the brush touches the joint, you can go from a dry-fit to a permanent bond, just in minutes.
Besides, when applied, the extra thin cement melts and welds plastic together.
Capillary action acts in reverse on the melting plastic because the chemicals are so potent and the glue is so thin.
Glue is drawn into the plastic as a result of this action. It brings the two sections together and combines them at the seam.
Another sign of the strong melting potency is that liquid plastic will flow out of the joint after letting it take some time to work once you squeeze the pieces together really hard.
If you do a lot of kit-bashing and conversions, you’ll know that your cuts and joins can be a little rough at times.
On its own, this cement smooths out those rough parts where you got a bit carried away with a chisel cut or something, and it reduces gap filling and cleanup to almost pro levels of efficiency.
How long does it take for Tamiya extra thin cement to set?
In general, it takes about 10 seconds for Tamiya Extra Thin cement to set. However, it takes around 40 seconds for it to dry. The quick setting and drying are because Tamiya Extra Thin cement is made out of Butyl Acetate and Acetone, which is good for capillary action and dries quickly.
Tamiya extra thin cement comprises 50% Butyl Acetate, 50% Acetone, and other quick setting components like 40% Ethyl Acetate, 40% Acetone, and 20% Butanone.
When put on plastic, Ethyl Acetate evaporates faster and heats more than Butyl Acetate.
When a regular plastic cement takes 2-3 minutes to set up completely, Tamiya’s extra thin adhesive only takes 10 seconds to set, thanks to its capillary action mechanism.
Tamiya Extra Thin Cement is a popular plastic cement among modelers all around the world. It’s available in most pro modeler’s workshops.
How do you use Tamiya extra thin cement?
To use the Tamiya extra thin cement, you simply hold the model together by applying the glue using the tiny brush (included in the cap) to the joint and waiting for about 40 seconds for it to dry completely. You can also use the extra thin cement as a thinner by mixing it with regular cement if necessary.
You can use Tamiya’s extra thin cement to glue plastics that require fast setting and drying.
Furthermore, you can use it as a support for the regular Tamiya cement for stronger bonds.
Lastly, the extra-thin cement can also fill gaps and cracks because of its intense capillary action.
Plastic Kit Freak, a Youtuber, prefers to use extra-thin glue to support the regular Tamiya cement.
To make the bond more secure, Plastic Kit Freak spreads the extra-thin cement along the borders of each part after gluing them together with regular adhesive.
He also made a fascinating point about the extra thin cement as the glue that can remove paint smudges like turpentine or paint remover.
Like him, Plamo Therapist also uses it as a supplement and glues tiny little parts that need to dry quickly.
TibbsForge, a blogger, uses the extra thin cement to fill and erase seams and gaps.
Using the Tamiya extra thin cement to fill gaps takes a few treatments, but going over a seam that’s previously glued but visible will fill in and pull some of the plastic up to fix it seamlessly.
He applied it on spots like space marine torsos.
The neck space and sides will always have noticeable seams when using the extra thin cement, but it’s how the extra thin cement works.
That’s why I prefer using regular plastic cement when filling gaps since it only takes fewer applications to fill some gaps. However, the regular cement will dry longer.
When sealing them together, TibbsForge gave the extra thin cement another shot after it had dried completely (which can take a while), and they had almost vanished.
Surprisingly, they were completely gone after three treatments.
According to him, Tamiya’s extra thin cement, so far, is the simplest solution to fill and erase gaps.
It will not replace Liquid Green Stuff, ordinary Green Stuff, or putties like Tamiya White Putty or Squadron Green, but it will undoubtedly complement them.
Disadvantages of using the Extra Thin Cement
The main drawback of the extra-thin cement is that you have to be cautious because this material tends to flow over seams. Furthermore, the glue dries fast, so if you’re not careful, you can make errors in the gluing process. Lastly, because it melts plastic, it can mix the colors of different plastics when applied.
So, if you overdo it, Tamiya’s extra thin cement will flow towards the surface you’re holding, and you’ll finish up leaving a fingerprint on it.
It’s thin, fast, and you won’t have much time to fix it.
You should also be aware while using the glue.
Tamiya’s extra thin cement melts plastic so rapidly and thoroughly that brushing over the same area will result in a little bit of plastic collecting on the brush’s tip.
However, when you put the brush back into the bottle, it just disperses into the bottle and does not cause the material to become foggy.
Final thoughts
When you find your passion as a plastic kit modeler, you will learn to improvise your tools to match your skills and capability.
And, this is the fascinating part of building kit models. Every blogger mentioned here is pro in their field, and they used the product to extract the most benefit from it.
As a beginner, follow the instructions first; when you’ll excel in your attempts, figure out how to use them.
What’s next? Have you thought of using superglue in the gluing process? If yes, you might be interested in my other blog post. Here is the link: Plastic Cement vs. Super Glue

“Only the things I love”
thediecastmodel.com is reader-supported. When you buy through links on the site, I earn an affiliate commission.
So, here are the things I love when taking care of my Diecast Models.
Cleaning the Models
The first we are going to talk about is cleaning the models.
Removing Dust
- Air Brush – For me, this is the best since it not just removes dust but you can use it in painting/clear coating.
- Air Duster – This is a good alternative to Airbrush
- Normal Brush – If you are short on budget, you can use a normal brush. However, make sure that the brush has soft bristles because there are some hard brushes than can cause scratches. That’s why I recommended a good brush that can do the job properly.
Cleaning and Shining Hacks
Well, here are some of my cleaning hacks for removing scratches, oxidation, and so much more.
- Removing Decal Adhesive – Use Goo Gone on those hard-to-remove decal adhesives. It works fast and works like charm!
- Waxing and Polishing – Here is something a lot of people don’t know. Waxing protects the clear coat and paint while polishing shines the model. Instead of buying it separately, use a 2 in 1 to save money. Get this instead.
- Beginner Wax – The wax I recommended earlier is good and provides the best results based on my experience. But a beginner might have a problem especially if they’re not good at applying wax. Solid wax reaching hard to reach surface can be hard to remove. You have two choices here. One is to use a qtips to reach those surfaces, another is to use a liquid wax I recommended.
- Cleaning Wheels, Rubber, Plastic – Do not forget that rubber and plastic surface are quite different, especially in the cleaning process. Just wiping it down won’t do the job. That’s why I use Meguiar’s Vinyl and Rubber Cleaner and Conditioner. Works like charm!
- Make the Wheels Shine! – Making our models look good won’t be complete without tiny details such as shiny wheels! Do not forget this because however small this is, the difference can be as big as night and day.
- Remove Scratches Easily – Tiny scratches are not the end for your model. Here is a simple trick I’ve been using to make my models look scratch-free even without repainting. Use T-Cut.
Painting the Models
Painting Tools
Make sure when you paint models, have these ready.
- Tape – A tape is important if you are painting a straight line. Furthermore, it will prevent your paint to scatter on other parts. I recommend Tamiya Tape since it is really made for models. Furthermore, they stick really well preventing paint splatters.
- Brush (Beginner) – Find a good set of brushes to paint your models. Of course, you can opt for an airbrush but it’s quite expensive.
- Airbrush (Intermediate/Expert) – This will yield a significantly better result than an ordinary brush because you can easily spray the paint evenly. I recommend this if you know what you’re doing.
- Stand(Optional) – Stands are good because it can be hard to manually hold the models while painting. It is optional but in my opinion, the price is well worth it for the comfort it gives.
- Drop Cloths – Drop Cloths will protect your surroundings from the paint.
- Primer – The most common beginner mistake I see is painting models without any Primer. A primer will prevent imperfections such as bubbles or paint not sticking to your models. It is a small price to pay for quality results.
- Clear Coat – A clear coat will protect the paint of your models. This will make the paint last longer. Also, it is the one responsible for making your models shine.
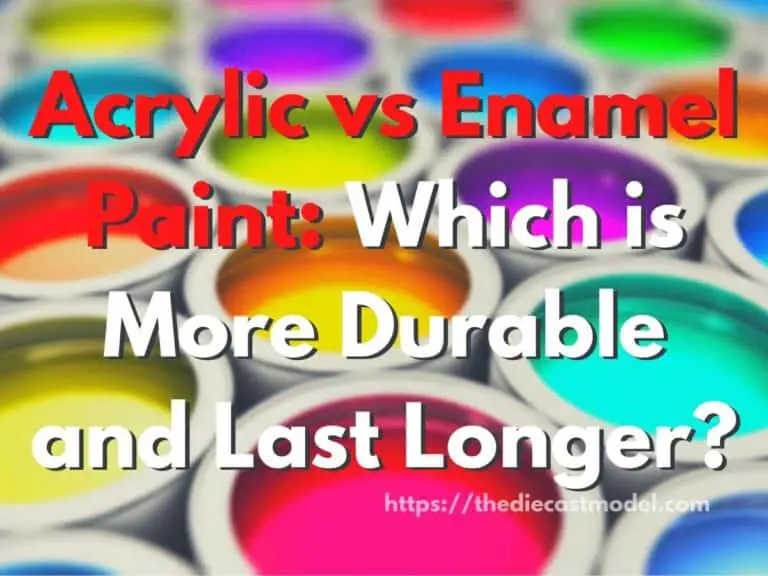
Paints
Of course, you can’t do painting properly without paint. So here are the ones I recommend.
- Acrylic Paint – Good for beginners because it dries quickly. However, it doesn’t produce results as good as enamel paint.
- Enamel Paint – Provides a good quality finish and longer-lasting paint. However, it takes longer to dry and requires expertise to use.
Model Maintenance
Model Storage
- Simple Wood Cabinet – While it doesn’t let you display your models, wooden cabinets are good storage for these models. For one, they are not heat conductors which means that the temperature inside will remain constant and remain cool. Furthermore, they prevent light from reaching the models which can cause oxidation.
- Clear Cabinet with Lock – If you want to display your models, then I recommend this. It closes so dust won’t easily get to your models. I also recommend you don’t put more than 1 model in each compartment since metals are good conductors of heat.
Model Photography
So you want to show off your models to others? Well, I got you covered.
Here is my beginner-friendly model photography tutorial that teaches everything from taking pictures to the editing process.
You will also see me doing hands-on photography in that tutorial.
Here is the link: How to Take Pictures of a Diecast Model or Model Kit | Helpful Illustrated and Video Guide