Do Hot Wheels Glow in the Dark? How to Make Them Glow?
Some of us would want a glow in the dark Hot Wheels. But is it possible? Are Hot Wheels glow in the dark? If not, are there Hot Wheel lines that are glow in the dark? If you don’t have these lines, how do we make them glow in the dark?
Generally speaking, Hot Wheels don’t glow in the dark. However, there are special Hot Wheels car lines that glow in the dark, such as the Glow Wheels and their glow in the dark monster trucks. You can also apply glow in the dark paint on models to make them light up in the dark.
This post will talk about if Hot Wheels glow in the dark, the scientific principle behind the glow in the dark, and some simple steps we can do to make models glow in the dark. Let’s start!

Are there glow in the dark hot wheels?
There are glow in the dark Hot Wheels such as the one from the Glow Wheels and the Dark Monster Trucks line. These special lines glow in the dark without any additional modifications. However, most Hot Wheels don’t glow in the dark.
When you go to a hobby or toy store, most of the Hot Wheels you will see for sale aren’t glow in the dark.
In fact, in my collection, I only have two glow in the dark Hot Wheels, and they are both from the same Glow Wheels line.
Here is the photo of two of my glow in the dark Hot Wheels.
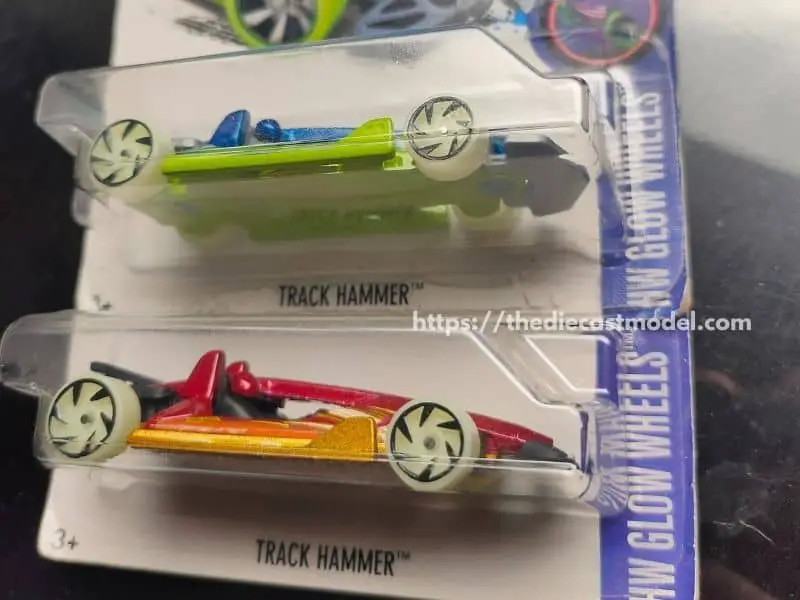
The Glow Wheel line is a special line from Hot Wheels that focuses on glow in the dark models.
As you can also see, their wheels have a different color from other model lines.
This is because these models glow in the dark without any additional modifications. Their wheels are made with glow in the dark materials.
This is also true for another Hot Wheels line that glows in the dark called the Dark Monster Trucks line.
These model lines have this unique feature, and their glow-in-the-dark parts are made of different materials rather than the typical diecast metals and plastic.
This content was originally posted on thediecastmodel.com. If it appears on other websites, it is a violation of the copyright owned by thediecastmodel.com.
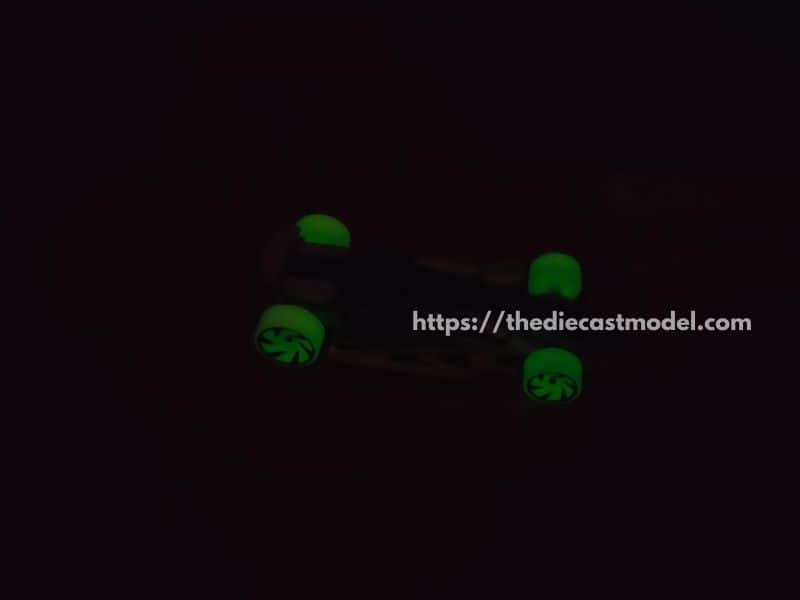
Here is a photo of my Glow Wheels in a dark environment. As you can see, the wheels glow when the lights are removed.
But what’s the difference between a glow in the dark and not a glow in the dark? What makes them glow?
What’s the basic scientific principle behind glow in the dark? Let’s find that out in the next section.
Scientific Principle Behind Glow in the Dark
Glow in the Dark glows by the process called phosphorescence. This process comes from a special material used in these products called phosphor. The phosphor absorbs light and emits its absorbed light which can be seen in dark environments.
The scientific principle behind the glow in the dark comes from the process called phosphorescence.
All glow in the dark objects is made with a material called phosphor. This material has a unique property which is why it is used on glow in the dark objects.
To make it simpler to understand, think of phosphor as a sponge.
When you expose a sponge to water, it will absorb water. Therefore, even if it is placed in a dry environment, it will remain wet as long as the water isn’t fully evaporated.
That’s the same with phosphor. Phosphor is a material that absorbs light and emits it gradually for a long time.
Phosphor emits light regardless of whether the environment is bright or not. However, since it only emits light on a small scale, we can only see the light it emits when we put it in a dark place.
As long as it has time to absorb light, it will continue to glow in the dark.
Since this material emits light, it is often called a luminescent material.
However, since it only stores the light it absorbs, it isn’t true that a glow in the dark lasts forever. It still needs to absorb light from the sun, LED, or lamps.
But how do phosphors store light?
Phosphors stores and emit light using a principle called excitation. The light alters the electron properties of phosphors, which means that they store that energy inside their molecules.
Thus, when this happens, phosphors have excess energy that can release with a process known as electron excitation, also known as electroluminescence.
When they use this energy, they release light which we can see on glow in the dark objects.
The good news is that since we now know the principle behind the glow in the dark, we can make all models glow with simple steps.
That’s what we will talk about in the next section.
How To Make Hot Wheels glow in the dark?
You can make Hot Wheels glow in the dark by applying glow in the dark paints. The easiest way is to use glow in the dark nail polish on models since these liquids are usually clear, dries quickly, and are inexpensive.
So, how do we make Hot Wheels glow in the dark if we don’t have those glow in the dark lines?
Well, it is as easy as applying a phosphor-based paint or glow in the dark paint.
Thus, you can make all Hot Wheels or any diecast model glow in the dark by applying phosphor-based paints.
But where do we find these paints? Well, we can use glow in the dark nail polish.
These nail polish can be bought anywhere where makeup is being sold.
If you’re shy about going to makeup stores, you can even get them online.
If you want to buy online, make sure to get the clear colored ones so they won’t affect the color of your model.
Another good news is that the nail polish can act as the topcoat to protect the model from scratches and oxidation, which leads to lead rot or zinc pests.
I know it can be hard to find a glow in the dark nail polish that will work on your model, so I found one for you that you can buy here: Glow in the Dark, Clear, Nail Polish.
Recommended Read: Do you want to preserve the value of your Hot Wheels and at the same time open their card? How about learning how to open Hot Wheels without damaging their card? I made a simple How to post here for you to follow: How to Open Hot Wheels without Damaging the Card.
Note: The recommended post above is about opening Hot Wheels without using a drill. But I made some bonus tips at the end of the post on how to open the packaging without damaging the card.

“Only the things I love”
thediecastmodel.com is reader-supported. When you buy through links on the site, I earn an affiliate commission.
So, here are the things I love when taking care of my Diecast Models.
Cleaning the Models
The first we are going to talk about is cleaning the models.
Removing Dust
- Air Brush – For me, this is the best since it not just removes dust but you can use it in painting/clear coating.
- Air Duster – This is a good alternative to Airbrush
- Normal Brush – If you are short on budget, you can use a normal brush. However, make sure that the brush has soft bristles because there are some hard brushes than can cause scratches. That’s why I recommended a good brush that can do the job properly.
Cleaning and Shining Hacks
Well, here are some of my cleaning hacks for removing scratches, oxidation, and so much more.
- Removing Decal Adhesive – Use Goo Gone on those hard-to-remove decal adhesives. It works fast and works like charm!
- Waxing and Polishing – Here is something a lot of people don’t know. Waxing protects the clear coat and paint while polishing shines the model. Instead of buying it separately, use a 2 in 1 to save money. Get this instead.
- Beginner Wax – The wax I recommended earlier is good and provides the best results based on my experience. But a beginner might have a problem especially if they’re not good at applying wax. Solid wax reaching hard to reach surface can be hard to remove. You have two choices here. One is to use a qtips to reach those surfaces, another is to use a liquid wax I recommended.
- Cleaning Wheels, Rubber, Plastic – Do not forget that rubber and plastic surface are quite different, especially in the cleaning process. Just wiping it down won’t do the job. That’s why I use Meguiar’s Vinyl and Rubber Cleaner and Conditioner. Works like charm!
- Make the Wheels Shine! – Making our models look good won’t be complete without tiny details such as shiny wheels! Do not forget this because however small this is, the difference can be as big as night and day.
- Remove Scratches Easily – Tiny scratches are not the end for your model. Here is a simple trick I’ve been using to make my models look scratch-free even without repainting. Use T-Cut.
Painting the Models
Painting Tools
Make sure when you paint models, have these ready.
- Tape – A tape is important if you are painting a straight line. Furthermore, it will prevent your paint to scatter on other parts. I recommend Tamiya Tape since it is really made for models. Furthermore, they stick really well preventing paint splatters.
- Brush (Beginner) – Find a good set of brushes to paint your models. Of course, you can opt for an airbrush but it’s quite expensive.
- Airbrush (Intermediate/Expert) – This will yield a significantly better result than an ordinary brush because you can easily spray the paint evenly. I recommend this if you know what you’re doing.
- Stand(Optional) – Stands are good because it can be hard to manually hold the models while painting. It is optional but in my opinion, the price is well worth it for the comfort it gives.
- Drop Cloths – Drop Cloths will protect your surroundings from the paint.
- Primer – The most common beginner mistake I see is painting models without any Primer. A primer will prevent imperfections such as bubbles or paint not sticking to your models. It is a small price to pay for quality results.
- Clear Coat – A clear coat will protect the paint of your models. This will make the paint last longer. Also, it is the one responsible for making your models shine.
Paints
Of course, you can’t do painting properly without paint. So here are the ones I recommend.
- Acrylic Paint – Good for beginners because it dries quickly. However, it doesn’t produce results as good as enamel paint.
- Enamel Paint – Provides a good quality finish and longer-lasting paint. However, it takes longer to dry and requires expertise to use.
Model Maintenance
Model Storage
- Simple Wood Cabinet – While it doesn’t let you display your models, wooden cabinets are good storage for these models. For one, they are not heat conductors which means that the temperature inside will remain constant and remain cool. Furthermore, they prevent light from reaching the models which can cause oxidation.
- Clear Cabinet with Lock – If you want to display your models, then I recommend this. It closes so dust won’t easily get to your models. I also recommend you don’t put more than 1 model in each compartment since metals are good conductors of heat.
Model Photography
So you want to show off your models to others? Well, I got you covered.
Here is my beginner-friendly model photography tutorial that teaches everything from taking pictures to the editing process.
You will also see me doing hands-on photography in that tutorial.
Here is the link: How to Take Pictures of a Diecast Model or Model Kit | Helpful Illustrated and Video Guide