Model Kits: Do they come with paint?
When building model kits, one of the common questions asked is if model kits come with paint. It is quite a pain for beginners to buy paint, especially if they have no idea what to choose. This blog post will briefly introduce model painting and answer if model kits come with paint.
As a general rule, model kits don’t come with paint. However, although rare, some model kits include paint in their packaging. There are also some model kits that come with stickers instead of paint. The good news is that model paint can easily be bought online and in hobby stores.
In this blog post, we are going to discuss a brief introduction to model painting. Then, we will discuss the types of paint you can use and what’s suitable for beginners. This is to help a beginner modeler in starting the hobby.
Do model kits come with paint?
Let’s start with a brief introduction to model kits.
Building plastic model kits is a modern hobby, which has its root in the 1930s.
The hobby has evolved with the advancement of manufacturing technology.
Even though people have been building model kits for decades, the latest ones on the market tend to be the most detailed, thanks to technology.
With the rise of technology, plastic kit molds are more detailed, allowing modelers to enjoy themselves even more as they improve their model-building skills.
But why am I explaining this?
Well, plastic kit manufacturers know that they have to make the hobby as easy as possible to attract more hobbyists. Thus, they made the hobby as easy as possible.
This means they colored the plastics in a way that modelers don’t need paint.
Since paint is unnecessary, there is no need to include paint in model kit boxes.
However, experienced modelers tend to want some personal customization. That’s when they have to paint or glue their models for kitbashing.
In these instances, they need to buy paint for their models. But beginners don’t need to.
Furthermore, some highly difficult models might require some painting. Thus, you need to familiarize yourself with model difficulty to buy what fits your skills at the moment.
Recommended Read: Knowing the model kit difficulty level is essential for beginners as they should buy model kits that are made for experienced ones. Thus, you need a guide on the ability levels. One of the most famous plastic model kit brands is Tamiya. Thus, I created a post discussing the difficulty levels to get you familiarized with them. Here is the link: Model kit ability levels comparison.
Here is a big tip for beginners.
Don’t overspend if you’re new to the hobby of model kit building.
Paints and glue are optional. In fact, you only need three tools for model building: model nipper, model knife, and files.
Here is a picture of my basic model kit tools.
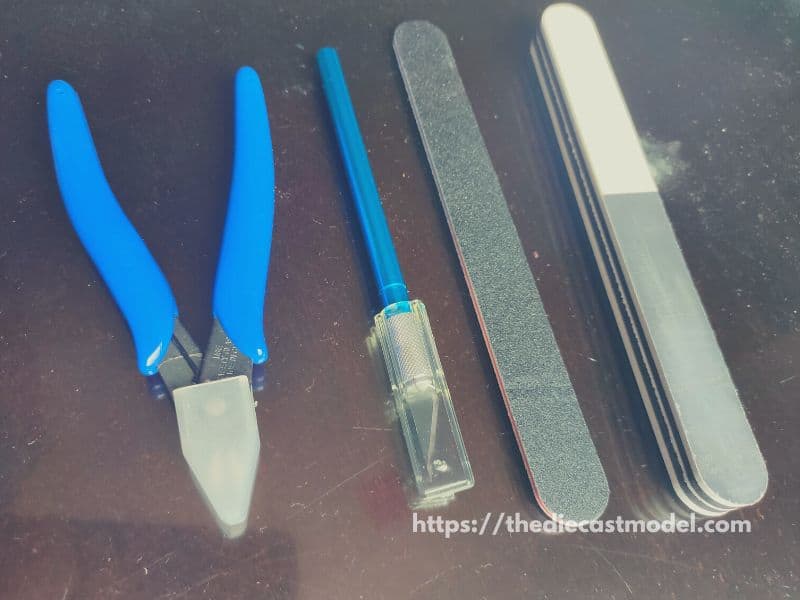
The great news is you don’t need to buy them separately as you can get them in the set for a cheap price.
For example, you may find them on Amazon. Here is a link.
In short, don’t stress about making the kit look professional; instead, use your first few kits as a learning experience to help you develop the skills and techniques required to complete a model.
The three tools above are the only things you need to start. There is no need to buy more than you need.
If you want to see me using these in action, check my Youtube video here:
Of course, as you progress, you will come across a plethora of valuable tools and supplies that you may want to purchase, such as paint and glue.
Your local hobby shop or online retailer will be able to help you progress into new materials and tools that are appropriate for your skill level.
The paint colors needed for most model kits will be listed on the box or in the instructions.
Ask your hobby shop or online retailer to pull a kit from the shelf and tell you which colors you’ll need.
Again, you aren’t required to spend a fortune on tools when you’re first starting.
Begin with the bare minimum required to assemble a kit. Then, if you enjoy the hobby, you will gradually increase and expand the tools and supplies in your workshop.
What kind of paint do you use on a model car kit?
The paints you use on a model car kit are enamel and acrylic paint. Generally speaking, enamel paints are more durable than acrylic paints. However, acrylic paints are more beginner-friendly since they dry quickly. Furthermore, enamel paints are oil-soluble, while acrylic paints are water-soluble.
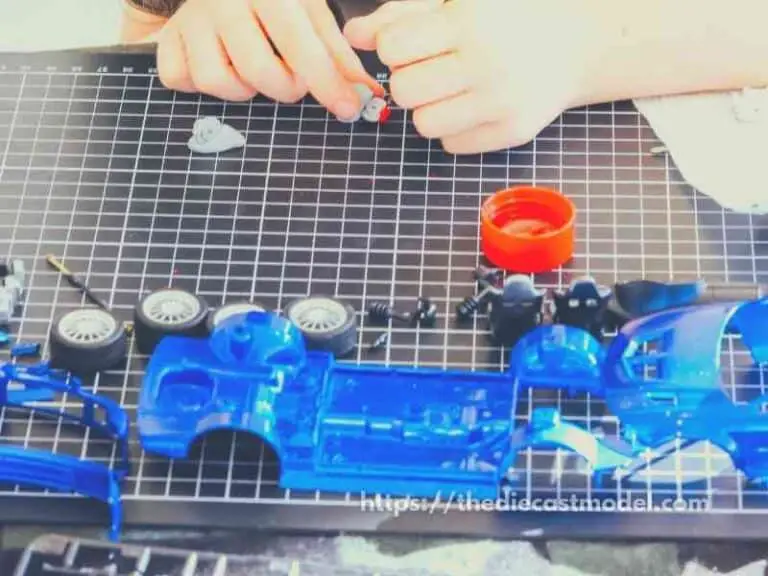
Painting model cars, for both beginners and advanced modelers, is a process that involves painting all of the model’s various parts.
Painting isn’t tricky, but it becomes more difficult with tiny or larger parts and when painting intricate details.
As a novice, all you need to worry about is getting the basics right.
Before selecting any color or brand that grabs your attention, you should know what kind of paint you want to use.
Different paints have different properties that influence how you should use them.
Make sure you select the appropriate type for your model, skill level, and goals.
For model kits, modelers typically use any of these two types of paint: acrylic and enamel.
1. Acrylic-based paint
Acrylic-based paints, which are the most commonly used for model kits, produce the best results.
This type of paint is created by combining color pigments with acrylic polymers emulsified with water to make the final product.
It is advisable to use Acrylic paint because they are beginner-friendly. The reason why Acrylic-based paints are beginner-friendly is that they dry in about 30 minutes.
2. Enamel paints
Enamel paints were the most commonly used type of paint for model kits until acrylic paints hit the market and performed similarly.
They combine color with linseed oil or other dry oil, and when these paints are applied, the drying oil reacts with the air, resulting in a hard, durable finish.
Because of this hard finish and the paint’s ability to bind to virtually any surface, some modelers still prefer to use enamel paint.
One disadvantage of enamel paint is that it takes a long time to dry and requires thinning agents like turpentine for cleanup.
In general, it takes 2 to 3 days for enamel paints to dry, making them unsuitable for beginners.
You must choose whether to paint your model car with acrylic or enamel paint.
But before choosing the best option for you, consider the following factors :
1. Paint Solvent
All paints contain a solvent, which absorbs the pigment and allows it to be applied to various surfaces.
Acrylic paint is water-based paint, whereas enamel paint is oil-based paint.
Each solvent has different performance characteristics that can help you decide which to use.
2. Drying time
I talked about this earlier since this is important.
If you want a quick drying time, use acrylic lacquer paint.
It should be dry to the touch within a half-hour of application and completely dry within a day.
In contrast, enamel paint cures in one to three days but may produce longer-lasting, higher-quality results.
3. Paint Cleanup
Because acrylic paint is water-based, all you’ll need to do is clean your brushes and tools in warm water or rubbing alcohol.
And enamel paint is oil-based, so cleaning up after a painting session will require mineral spirits or another paint thinning agent.
4. Paint Fumes
Acrylic paint dries by evaporating water.
Because there are no harmful toxins in the air, you can keep your windows and doors closed while painting.
Enamel paint cures via a chemical reaction between the oil in the paint and the oxygen in the air.
This process does emit potentially harmful fumes into the atmosphere.
To keep yourself safe, you’ll need proper ventilation where you’re painting.
5. Paint Application methods
Both types of paint will be applied using the same techniques– spray cans, airbrushes, and paintbrushes.
When painting your model car with an airbrush, keep in mind that you’ll need to thin your paint.
You should thin acrylic paint with water and thin enamel paint with mineral spirits or another thinning agent.
6. Paint Color options
The color options available to you may influence the type of paint you select.
Acrylic paint comes in a variety of colors to keep you busy and inspire you.
Enamel paint has fewer options, but the beautiful results may compensate for the lack of options.
Bonus tip – Use primer before painting
Plastic or diecast models should be primed before painting.
This will provide a consistent base for resin materials, diecast metals, or if the model is plastic with multiple colors.
If you’re painting lighter colors like white or yellow, this will reduce the number of coats required.
Another advantage of using a primer is that it lets you see minor flaws in the materials, which will need to be filled and sanded before applying your finishing coats.
What’s next? Many neglect priming since they see it as a bonus. However, I think that it is necessary to make the best out of your efforts. If you want to know why it is essential to prime models before painting, you may check my other blog post here: Do you really need to Prime Models?

“Only the things I love”
thediecastmodel.com is reader-supported. When you buy through links on the site, I earn an affiliate commission.
So, here are the things I love when taking care of my Diecast Models.
Cleaning the Models
The first we are going to talk about is cleaning the models.
Removing Dust
- Air Brush – For me, this is the best since it not just removes dust but you can use it in painting/clear coating.
- Air Duster – This is a good alternative to Airbrush
- Normal Brush – If you are short on budget, you can use a normal brush. However, make sure that the brush has soft bristles because there are some hard brushes than can cause scratches. That’s why I recommended a good brush that can do the job properly.
Cleaning and Shining Hacks
Well, here are some of my cleaning hacks for removing scratches, oxidation, and so much more.
- Removing Decal Adhesive – Use Goo Gone on those hard-to-remove decal adhesives. It works fast and works like charm!
- Waxing and Polishing – Here is something a lot of people don’t know. Waxing protects the clear coat and paint while polishing shines the model. Instead of buying it separately, use a 2 in 1 to save money. Get this instead.
- Beginner Wax – The wax I recommended earlier is good and provides the best results based on my experience. But a beginner might have a problem especially if they’re not good at applying wax. Solid wax reaching hard to reach surface can be hard to remove. You have two choices here. One is to use a qtips to reach those surfaces, another is to use a liquid wax I recommended.
- Cleaning Wheels, Rubber, Plastic – Do not forget that rubber and plastic surface are quite different, especially in the cleaning process. Just wiping it down won’t do the job. That’s why I use Meguiar’s Vinyl and Rubber Cleaner and Conditioner. Works like charm!
- Make the Wheels Shine! – Making our models look good won’t be complete without tiny details such as shiny wheels! Do not forget this because however small this is, the difference can be as big as night and day.
- Remove Scratches Easily – Tiny scratches are not the end for your model. Here is a simple trick I’ve been using to make my models look scratch-free even without repainting. Use T-Cut.
Painting the Models
Painting Tools
Make sure when you paint models, have these ready.
- Tape – A tape is important if you are painting a straight line. Furthermore, it will prevent your paint to scatter on other parts. I recommend Tamiya Tape since it is really made for models. Furthermore, they stick really well preventing paint splatters.
- Brush (Beginner) – Find a good set of brushes to paint your models. Of course, you can opt for an airbrush but it’s quite expensive.
- Airbrush (Intermediate/Expert) – This will yield a significantly better result than an ordinary brush because you can easily spray the paint evenly. I recommend this if you know what you’re doing.
- Stand(Optional) – Stands are good because it can be hard to manually hold the models while painting. It is optional but in my opinion, the price is well worth it for the comfort it gives.
- Drop Cloths – Drop Cloths will protect your surroundings from the paint.
- Primer – The most common beginner mistake I see is painting models without any Primer. A primer will prevent imperfections such as bubbles or paint not sticking to your models. It is a small price to pay for quality results.
- Clear Coat – A clear coat will protect the paint of your models. This will make the paint last longer. Also, it is the one responsible for making your models shine.
Paints
Of course, you can’t do painting properly without paint. So here are the ones I recommend.
- Acrylic Paint – Good for beginners because it dries quickly. However, it doesn’t produce results as good as enamel paint.
- Enamel Paint – Provides a good quality finish and longer-lasting paint. However, it takes longer to dry and requires expertise to use.
Model Maintenance
Model Storage
- Simple Wood Cabinet – While it doesn’t let you display your models, wooden cabinets are good storage for these models. For one, they are not heat conductors which means that the temperature inside will remain constant and remain cool. Furthermore, they prevent light from reaching the models which can cause oxidation.
- Clear Cabinet with Lock – If you want to display your models, then I recommend this. It closes so dust won’t easily get to your models. I also recommend you don’t put more than 1 model in each compartment since metals are good conductors of heat.
Model Photography
So you want to show off your models to others? Well, I got you covered.
Here is my beginner-friendly model photography tutorial that teaches everything from taking pictures to the editing process.
You will also see me doing hands-on photography in that tutorial.
Here is the link: How to Take Pictures of a Diecast Model or Model Kit | Helpful Illustrated and Video Guide
Sources: